killjoy
New Member
Killjoy’s Killswitch
Preface:
Do this at your own risk. I’m providing this information as a guideline only. Anything you do to your car is by your choice and yours alone. I’ll help you as best I can if you get stuck. Read this write up all the way through before you attempt this.
Upon completion, your car will not start unless the cruise button is activated. If cruise button is not on, the horn blows when you attempt to crank. Cheaper alternative to an alarm if you’re worried someone might attempt a GTA.
Materials needed:
- 2x SPDT 12v Relays (radio shack, autozone)
- A handful of wire, different colors. Literally what you have lying around will probably work. For the starter wire however, find something around 12 gauge (that’s a little bit thicker, you’ll see below)
- A handful of 3M Wire taps, male and female, a couple 12 gauge butt (barrel) connectors. These can be bought at a local radio install shop – I’d go here over radio shack or anywhere else as you usually can get plenty for less than $5. Might as well get 2 relay’s while you’re there. You can also get all this on the almighty internet.
- Digital Multimeter or, computer safe 12v test light. I use a test light for everything, many people believe they’re dangerous and can set off airbags. Stay away from airbags and you’ll be fine with a test light (I’ll repeat this during the write up)
- Black Electrical tape
- Strippers, Crimpers
- Power Drill with Philips head
- 10mm socket
- Zip Ties
- Self-tapping metal screw (for grounding)
- Killswitch diagram, print it up here: http://www.clubintegra.com/board/showpost.php?p=684434&postcount=26
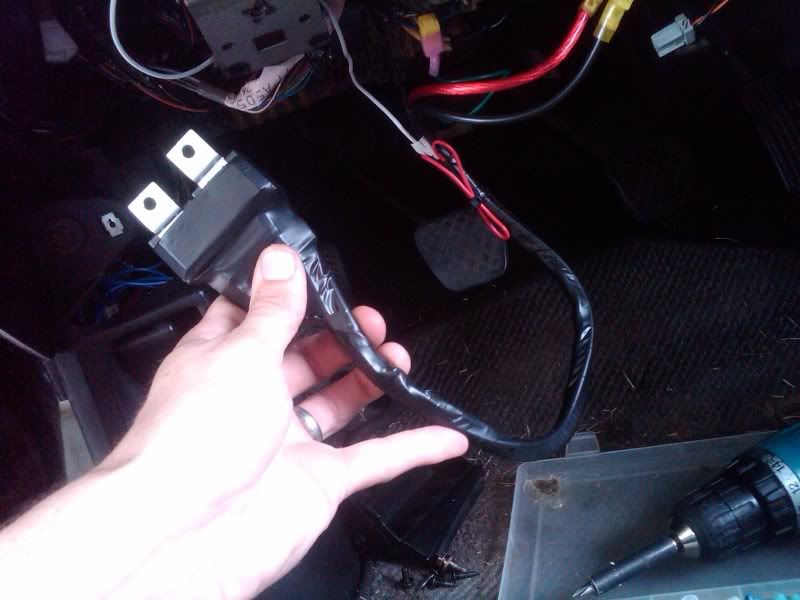
1. Start by wiring up the relays. Tape them together with the black tape first; we’re going to be making a harness. All you need to do really is copy the diagram.. pay attention closely to which color wire you’re assigning to which circuit. The wire that you open up the starter wire with (input and output) must be at least as thick as the starter wire in the car (it’s about 12 awg in the car). You can wire all 3 grounds to 1 wire. When you’re finished copying the diagram to your relays, your harness should look something similar to this:


Put the proper taps on the ends of your wires. Leave about 1’ to 1.5’ of length. The starter wires need butt connecters on both, the rest need male taps except for your ground wire, which needs a ring terminal for proper grounding.

(You’ll notice for the starter wires I didn’t use butt connectors, I used different taps. I just ran out is all, you should use butt or barrel connectors)
2. Time to take your car’s underdash apart for wiring access. There are 3 screws holding the plastic underdash on, 2 are obvious and the 3rd is behind the change pocket. Pull out the pocket for access.

3. Remove the metal barrier with a 10mm socket.

Next is to find, test, and tap your vehicle’s horn, cruise switch and starter wires.
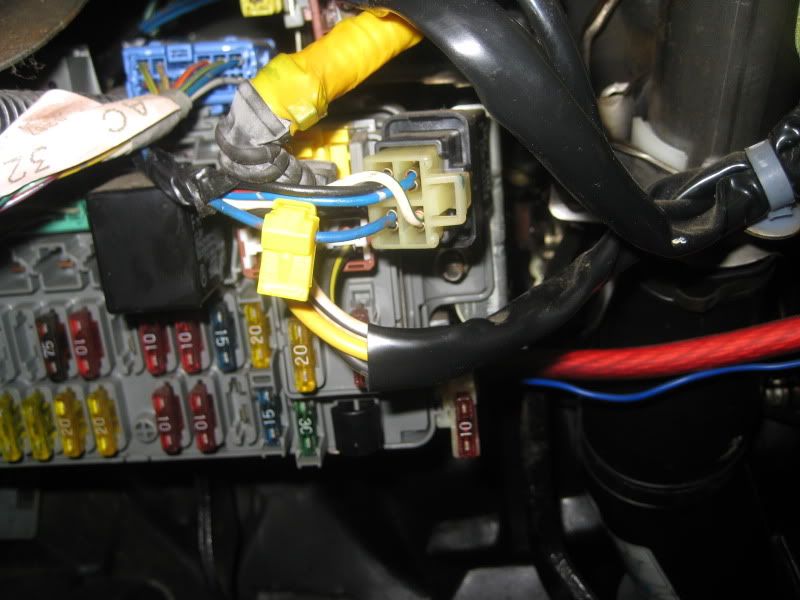
4. The horn can be found coming out of this plug attached to the fuse box, the color of the wire is blue/green. Tap this wire with one of your bigger gauge taps. This wire provides a negative trigger when the horn is pressed.

5. Pop your cruise switch out careful with a pick or if you’ve got nothing else, a flathead. Be careful doing this, it’s pretty easy to poke holes and nick up your dash. The light green wire is the wire we want to use, it provides a positive trigger when the button is pressed. TEST TEST TEST

NOTE: do NOT leave your cruise button on when you park and leave your car. It WILL kill your battery as it leaves the relay engaged. shut it off when you park your car (this is the point of the killswitch, anyways
6. Your starter wire can be found in this harness; it is a 12 or so gauge black/white wire. Test to ensure this is the wire, and then cut it right in half, with an even amount of length on each side for easiest integration. The starter INPUT wire from your relay = the KEY SIDE. OUTPUT = CAR SIDE of the same wire.

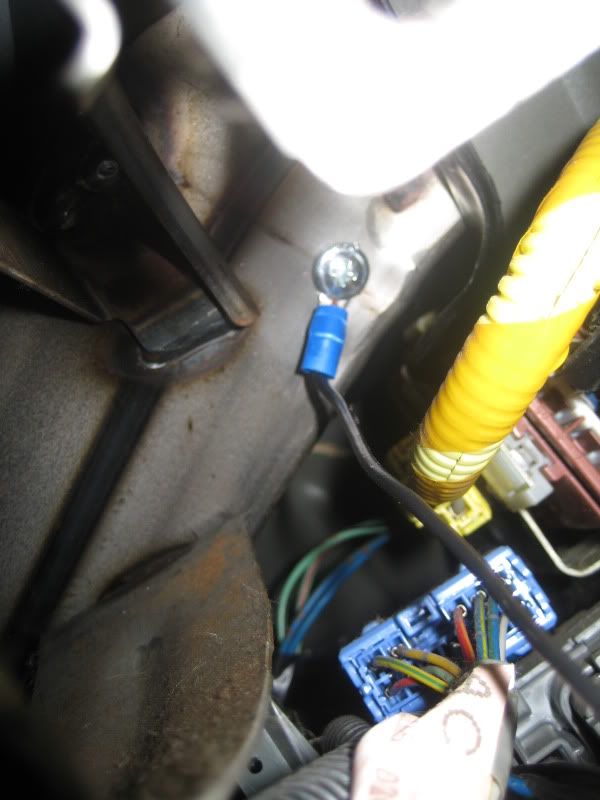
7. Ground your relay harness, before connecting anything. Find a solid piece of metal and this does NOT include the steering column itself. Self-tap screws are best but if you don’t have them, you could get away with using a screw that secures something into metal but I would not advise this. I found a nice piece of metal, here:

8. Connect all your wires from the relay harness, to their specific tap accordingly.
9. Once finished connecting, test to ensure functionality as I described in the beginning. If something doesn’t seem right, check your connections. This setup is working flawlessly in my vehicle.
10. Once you’re all set, tape up the relay harness with black tape. This is for added protection and the fact that it is much harder to find in your dash if it’s not so brightly colored. Now, take your relays and bury them in the dash somewhere, zip tie them to factory harnesses. BE CERTAIN to leave some stress relief for every single wire, ie, none of wires should be pulling tightly, this will cause the taps to fail.


Here is a (blurry, sorry) shot of my relay harness buried away.
A few last words…
Be careful doing this, set some time aside and make certain you’re sure about everything. It’s pretty easy to connect something wrong and blow a computer or worse. STAY THE HELL AWAY from YELLOW HARNESSES… these are airbag related, and if you accidentally ground one wire or send power to one wire in one, you could easily trip an airbag, which I sure would be bad news for you.
Good luck and enjoy. If you find this easy, then you should be able to tackle an alarm/remote start without too much of an issue, FYI.
-k
Preface:
Do this at your own risk. I’m providing this information as a guideline only. Anything you do to your car is by your choice and yours alone. I’ll help you as best I can if you get stuck. Read this write up all the way through before you attempt this.
Upon completion, your car will not start unless the cruise button is activated. If cruise button is not on, the horn blows when you attempt to crank. Cheaper alternative to an alarm if you’re worried someone might attempt a GTA.
Materials needed:
- 2x SPDT 12v Relays (radio shack, autozone)
- A handful of wire, different colors. Literally what you have lying around will probably work. For the starter wire however, find something around 12 gauge (that’s a little bit thicker, you’ll see below)
- A handful of 3M Wire taps, male and female, a couple 12 gauge butt (barrel) connectors. These can be bought at a local radio install shop – I’d go here over radio shack or anywhere else as you usually can get plenty for less than $5. Might as well get 2 relay’s while you’re there. You can also get all this on the almighty internet.
- Digital Multimeter or, computer safe 12v test light. I use a test light for everything, many people believe they’re dangerous and can set off airbags. Stay away from airbags and you’ll be fine with a test light (I’ll repeat this during the write up)
- Black Electrical tape
- Strippers, Crimpers
- Power Drill with Philips head
- 10mm socket
- Zip Ties
- Self-tapping metal screw (for grounding)
- Killswitch diagram, print it up here: http://www.clubintegra.com/board/showpost.php?p=684434&postcount=26
1. Start by wiring up the relays. Tape them together with the black tape first; we’re going to be making a harness. All you need to do really is copy the diagram.. pay attention closely to which color wire you’re assigning to which circuit. The wire that you open up the starter wire with (input and output) must be at least as thick as the starter wire in the car (it’s about 12 awg in the car). You can wire all 3 grounds to 1 wire. When you’re finished copying the diagram to your relays, your harness should look something similar to this:
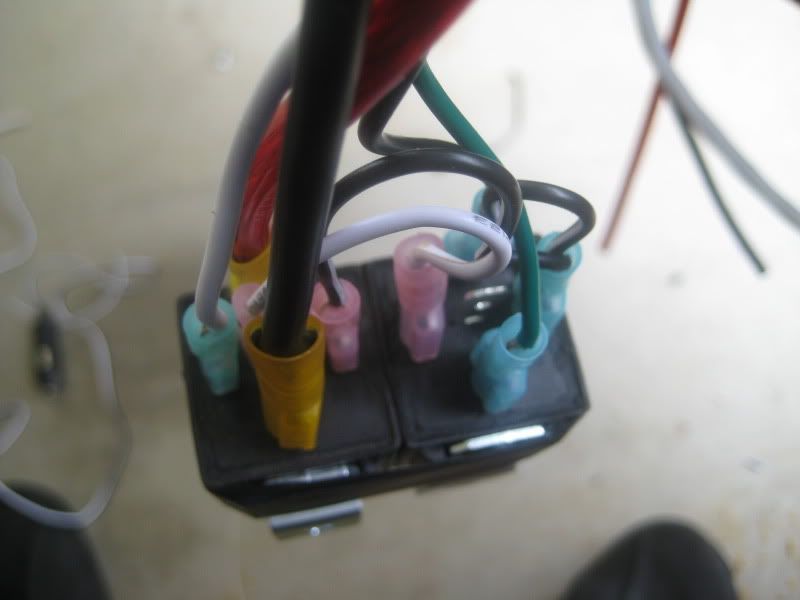
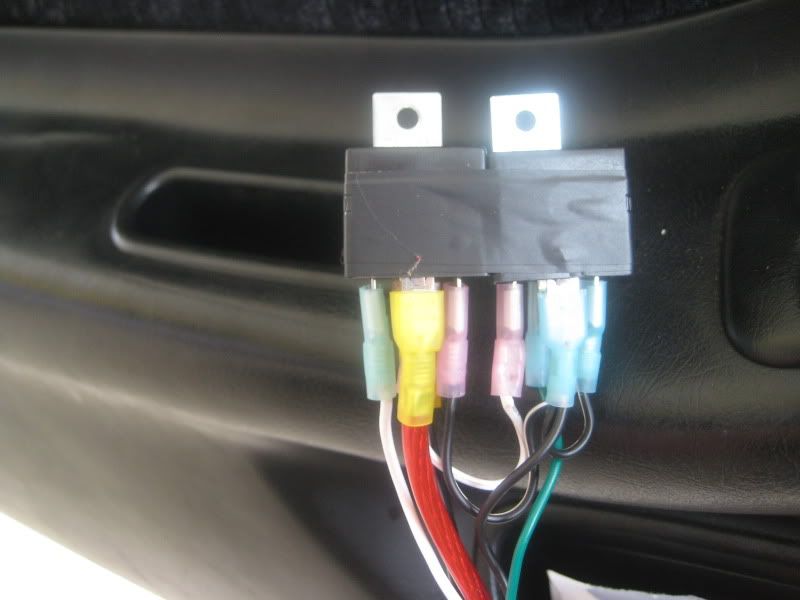
Put the proper taps on the ends of your wires. Leave about 1’ to 1.5’ of length. The starter wires need butt connecters on both, the rest need male taps except for your ground wire, which needs a ring terminal for proper grounding.
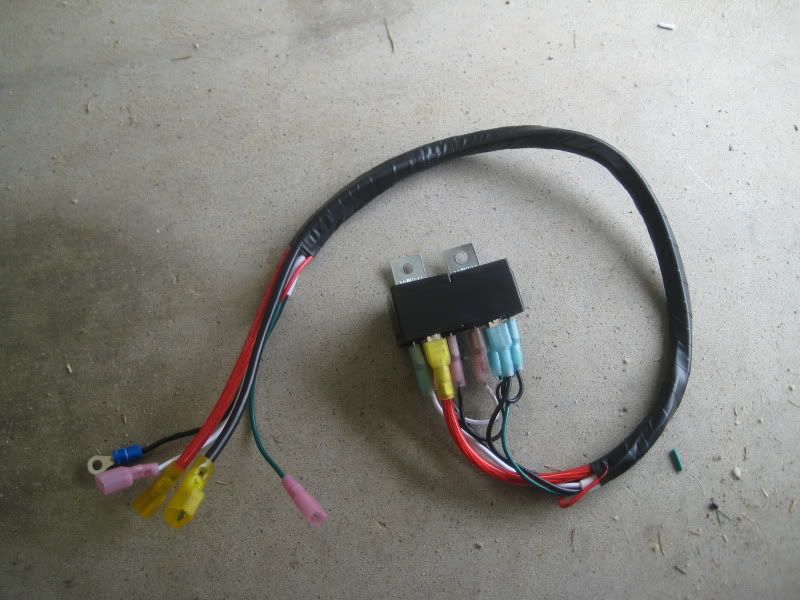
(You’ll notice for the starter wires I didn’t use butt connectors, I used different taps. I just ran out is all, you should use butt or barrel connectors)
2. Time to take your car’s underdash apart for wiring access. There are 3 screws holding the plastic underdash on, 2 are obvious and the 3rd is behind the change pocket. Pull out the pocket for access.
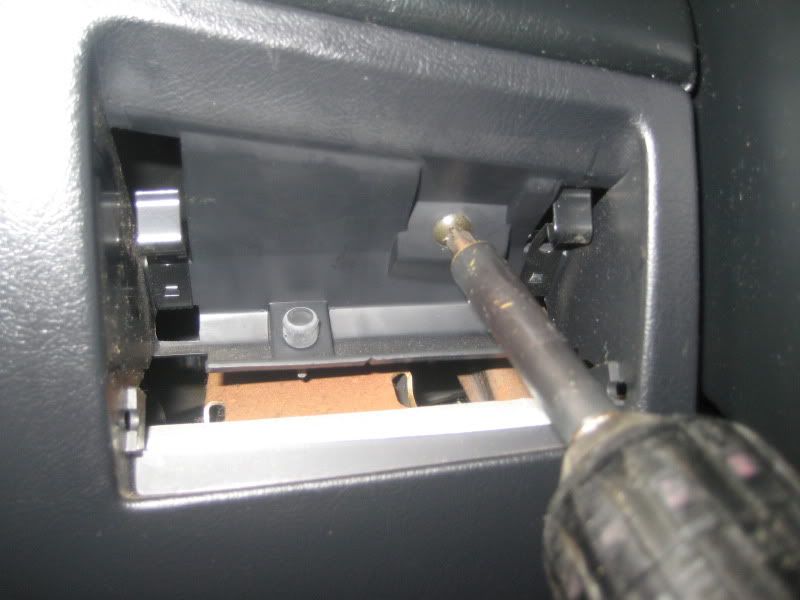
3. Remove the metal barrier with a 10mm socket.
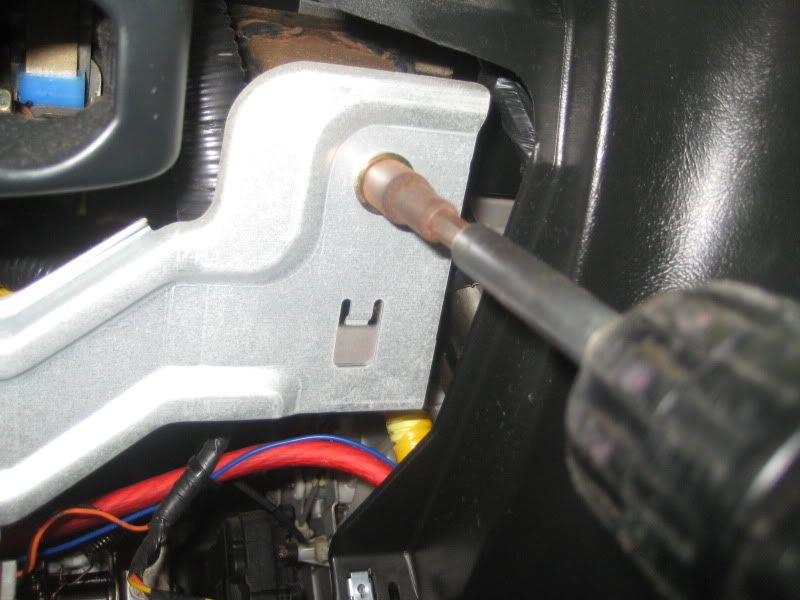
Next is to find, test, and tap your vehicle’s horn, cruise switch and starter wires.
4. The horn can be found coming out of this plug attached to the fuse box, the color of the wire is blue/green. Tap this wire with one of your bigger gauge taps. This wire provides a negative trigger when the horn is pressed.
5. Pop your cruise switch out careful with a pick or if you’ve got nothing else, a flathead. Be careful doing this, it’s pretty easy to poke holes and nick up your dash. The light green wire is the wire we want to use, it provides a positive trigger when the button is pressed. TEST TEST TEST
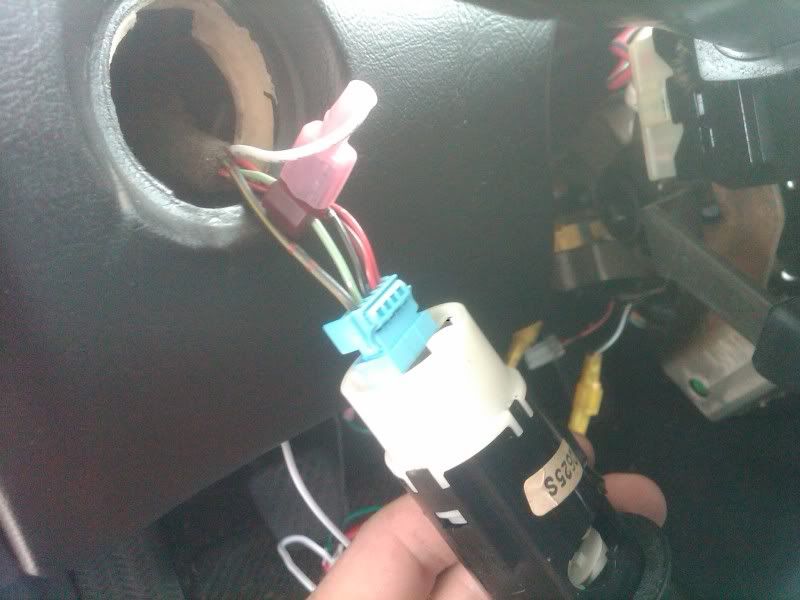
NOTE: do NOT leave your cruise button on when you park and leave your car. It WILL kill your battery as it leaves the relay engaged. shut it off when you park your car (this is the point of the killswitch, anyways
6. Your starter wire can be found in this harness; it is a 12 or so gauge black/white wire. Test to ensure this is the wire, and then cut it right in half, with an even amount of length on each side for easiest integration. The starter INPUT wire from your relay = the KEY SIDE. OUTPUT = CAR SIDE of the same wire.
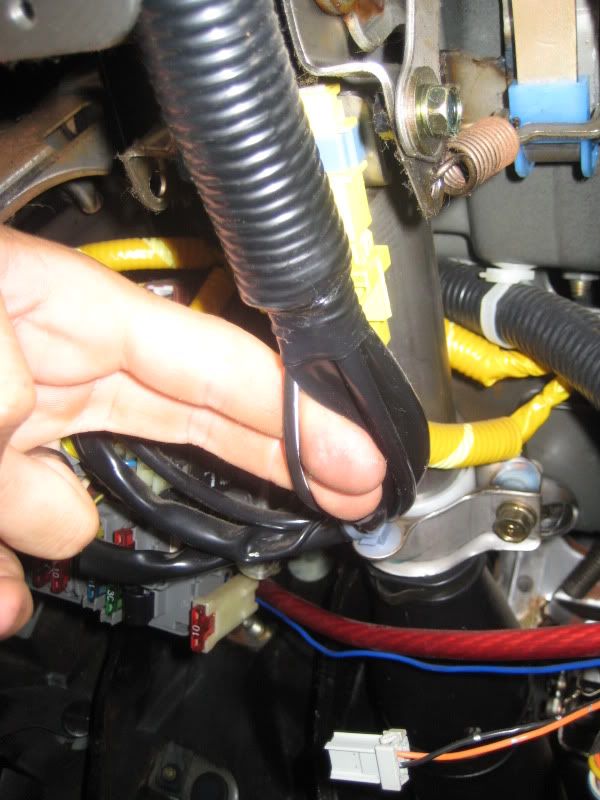
7. Ground your relay harness, before connecting anything. Find a solid piece of metal and this does NOT include the steering column itself. Self-tap screws are best but if you don’t have them, you could get away with using a screw that secures something into metal but I would not advise this. I found a nice piece of metal, here:
8. Connect all your wires from the relay harness, to their specific tap accordingly.
9. Once finished connecting, test to ensure functionality as I described in the beginning. If something doesn’t seem right, check your connections. This setup is working flawlessly in my vehicle.
10. Once you’re all set, tape up the relay harness with black tape. This is for added protection and the fact that it is much harder to find in your dash if it’s not so brightly colored. Now, take your relays and bury them in the dash somewhere, zip tie them to factory harnesses. BE CERTAIN to leave some stress relief for every single wire, ie, none of wires should be pulling tightly, this will cause the taps to fail.
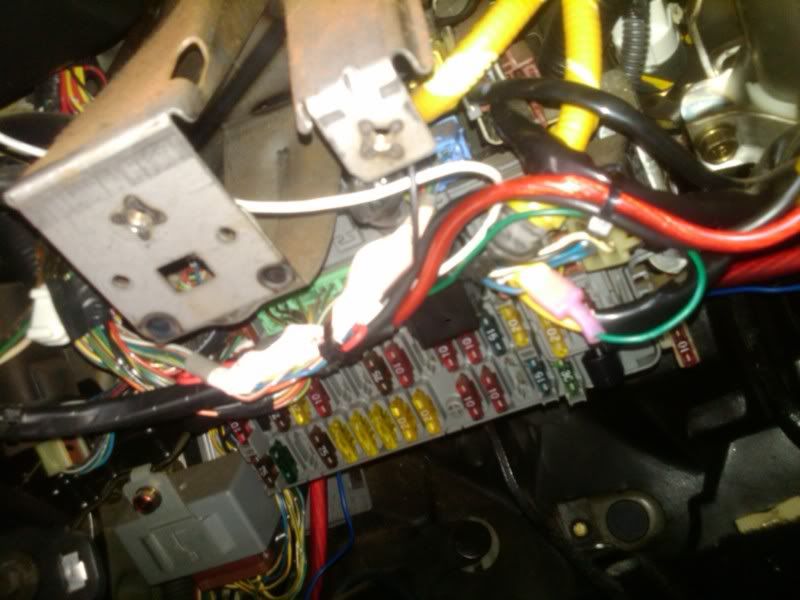
Here is a (blurry, sorry) shot of my relay harness buried away.
A few last words…
Be careful doing this, set some time aside and make certain you’re sure about everything. It’s pretty easy to connect something wrong and blow a computer or worse. STAY THE HELL AWAY from YELLOW HARNESSES… these are airbag related, and if you accidentally ground one wire or send power to one wire in one, you could easily trip an airbag, which I sure would be bad news for you.
Good luck and enjoy. If you find this easy, then you should be able to tackle an alarm/remote start without too much of an issue, FYI.
-k
Last edited:

