tinting

TheSkygun

New Member
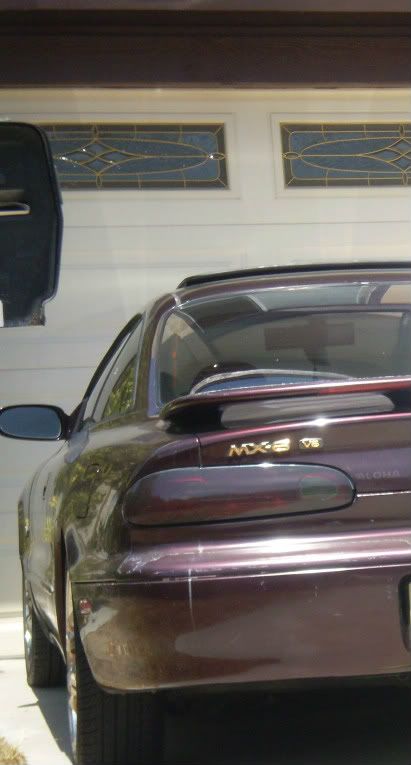
Ihad the tint on my mazda haha it won't mess up if you wash the car. making sure it has no creases when you apply it is the hard part. you might need an exacto knife to cut and smooth out creases around the corners.


nice, haha what brand of tint did you use? also did you apply them to your lights while still on the car or removed?

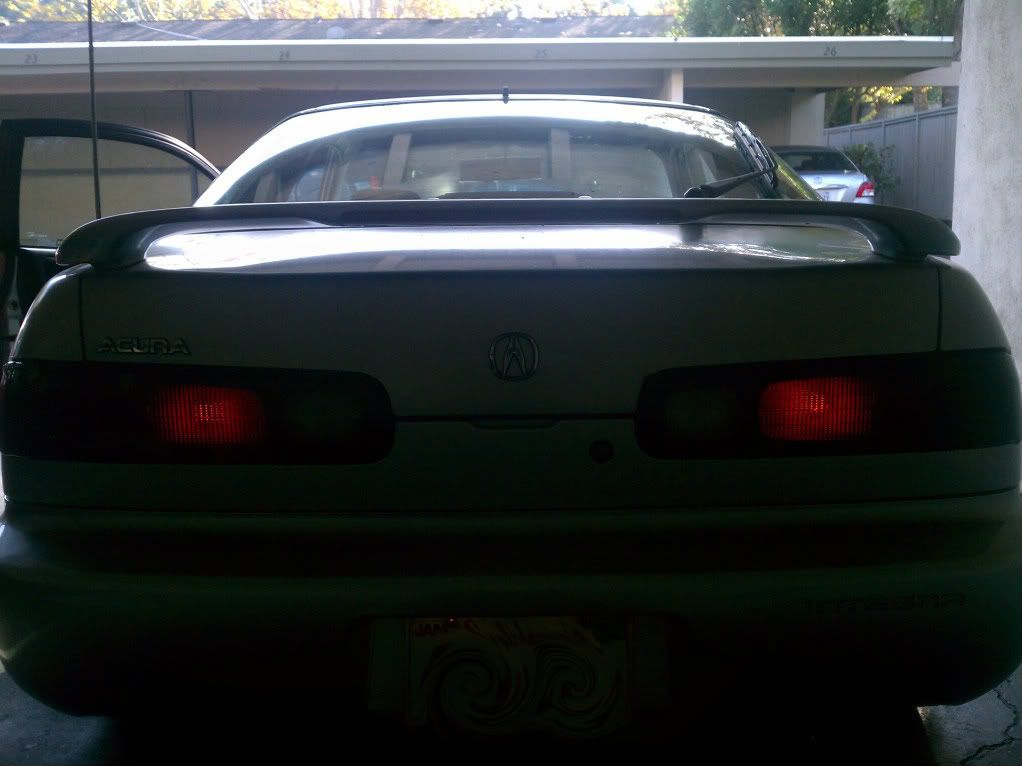
yeah applying it is a pain, i have to redue my tail lights but i did my corner amber lights today and they turned out good. i used a hair dryer to warm up the tint to mold it a bit easier, though i bet there are better methods to doing so
 

tork_sd89

Baywatch
I got it from this website a while ago. I was probably like 17 because that was before I hadf the car painted

http://www.decalfx.com/smoked_tail_light_film.html

I put the tint on when the lights were still on the car and I also used a hair dryer lol. I just used an exacto knofe/ box cutter to trim the excess film off. There were a few lines at the top and bottom of the light where it wraps around the side of the car but only visible when standing right next to the car. came out pretty good. Just remember to use a squigy or paint spatula wrapped with a paper towel or something so you don't scratch the film when applying it and trying to get the air bubbles out.

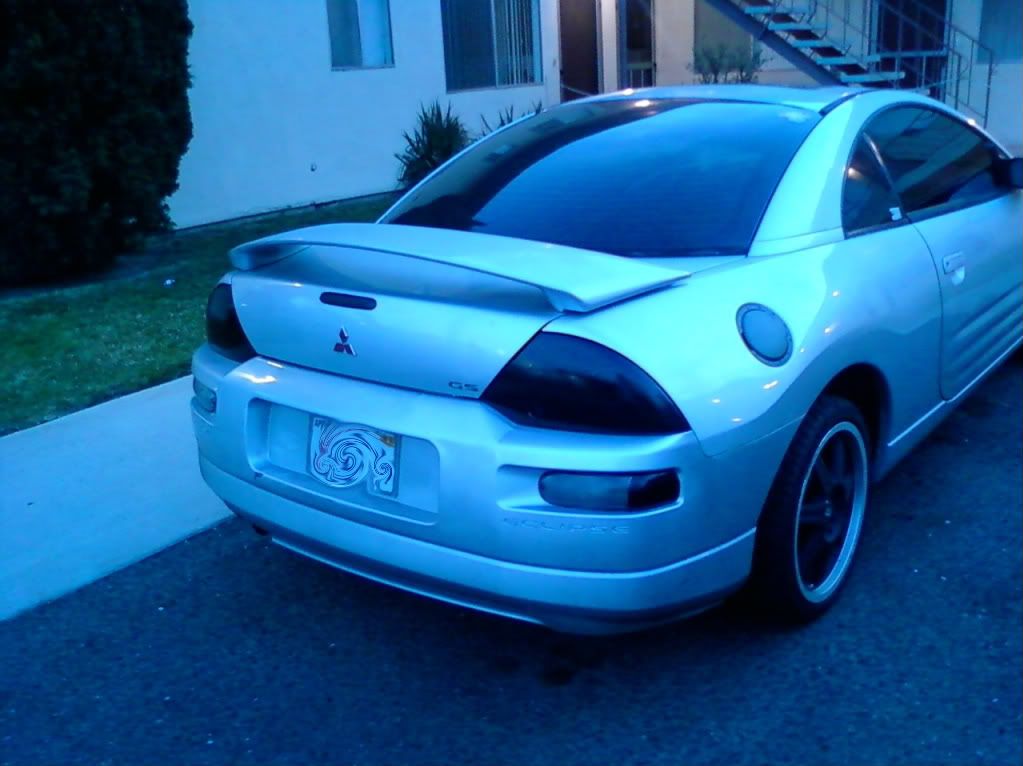
When I had my eclipse I used the spray 1. No wrinkles or bubbles 2. Muuuuch easier! The first time i tried to do it I screwed up big time they were way too dark and I sprayed a clear coat on them that had a bad reaction with the paint and they dried dull! I had to sand and sand until my arm almost fell off to remove that crap! then I tried again. The trick is to do it in warm weather so the paint doesn't run. and do a light coat for the 1st layer and let the paint. Let it dry about 15 mins then apply the second coat. dry for 15 mins and repat if you need more coats. I would highly rsuggest the paint if you can. It's like $10 on ebay for 1 can.

See how dark and dull they were the 1st time! That's another reason why I liked the wet-sanding method rather than a clear coat to make them shiny. because if you accidentally srpay too much you can slowly wet sand it down to a lighter tint.
 
Last edited:

TheSkygun

New Member
I got it from this website a while ago. I was probably like 17 because that was before I hadf the car painted

http://www.decalfx.com/smoked_tail_light_film.html

I put the tint on when the lights were still on the car and I also used a hair dryer lol. I just used an exacto knofe/ box cutter to trim the excess film off. There were a few lines at the top and bottom of the light where it wraps around the side of the car but only visible when standing right next to the car. came out pretty good. Just remember to use a squigy or paint spatula wrapped with a paper towel or something so you don't scratch the film when applying it and trying to get the air bubbles out.

When I had my eclipse I used the spray 1. No wrinkles or bubbles 2. Muuuuch easier! The first time i tried to do it I screwed up big time they were way too dark and I sprayed a clear coat on them that had a bad reaction with the paint and they dried dull! I had to sand and sand until my arm almost fell off to remove that crap! then I tried again. The trick is to do it in warm weather so the paint doesn't run. and do a light coat for the 1st layer and let the paint. Let it dry about 15 mins then apply the second coat. dry for 15 mins and repat if you need more coats. I would highly rsuggest the paint if you can. It's like $10 on ebay for 1 can.

See how dark and dull they were the 1st time! That's another reason why I liked the wet-sanding method rather than a clear coat to make them shiny. because if you accidentally srpay too much you can slowly wet sand it down to a lighter tint.

yeah the bubbles were a pain in the butt. only reason i liked to film is that living where i do, the cops like to give people a hard time for stupid stuff. i had a lanturn hanging on my mirror (even when i got tickets) and one decided to pull me over just for it (when the ones for tickets didnt care) just to inspect my car. i have been hearing the spray is much better but wasnt sure how much of a pain to get off it was. but for 10 bucks sounds worth it, but i still dont know what the wet-sanding method is.
 

TheSkygun

New Member
Thats how my tail lights turned out, when its light out ill take the corner light pictures


Last edited:

dbryder

Member
Wet sanding is a cleaner alternative to regular sanding of drywall mud from remodeling and repairs. Wet sanding requires a special sanding sponge that replaces the traditional drywall sanding screens and blocks. The sanding sponge is used barely damp and requires frequent rinsing and wringing during wet sanding.

Wet sanding is a great alternative to dry sanding when repairs have been made to damaged drywall or plaster, as well as in remodeling that occurs in or near lived-in areas of the home. In wet sanding, the sponge is damp enough to significantly reduce the amount of sanding dust that becomes airborne. For this reason, persons with allergies living through a remodel or repair may well appreciate this alternative technique. In high-use areas of the home such as kitchens or baths, wet sanding can significantly decrease the mess that normally accompanies drywall repair.

When properly executed, wet sanding does not alter the number of coats of drywall mud required, but the process does take longer than dry block sanding. This is mostly due to the number of times the sponge must be rinsed and wrung out, and depending on the size of the area, the water may need to be changed as well. You can reasonably expect to sand about a 3-foot square (about one square meter) section before needing to rinse and wring your sponge.

here'd how to do it for your car:http://carpaint.blogspot.com/2005/07/how-to-wet-sand-and-buff-your-car.html
 

BeatBox

Real Good!
Wet sanding is a cleaner alternative to regular sanding of drywall mud from remodeling and repairs. Wet sanding requires a special sanding sponge that replaces the traditional drywall sanding screens and blocks. The sanding sponge is used barely damp and requires frequent rinsing and wringing during wet sanding.

Wet sanding is a great alternative to dry sanding when repairs have been made to damaged drywall or plaster, as well as in remodeling that occurs in or near lived-in areas of the home. In wet sanding, the sponge is damp enough to significantly reduce the amount of sanding dust that becomes airborne. For this reason, persons with allergies living through a remodel or repair may well appreciate this alternative technique. In high-use areas of the home such as kitchens or baths, wet sanding can significantly decrease the mess that normally accompanies drywall repair.

When properly executed, wet sanding does not alter the number of coats of drywall mud required, but the process does take longer than dry block sanding. This is mostly due to the number of times the sponge must be rinsed and wrung out, and depending on the size of the area, the water may need to be changed as well. You can reasonably expect to sand about a 3-foot square (about one square meter) section before needing to rinse and wring your sponge.

here'd how to do it for your car:http://carpaint.blogspot.com/2005/07/how-to-wet-sand-and-buff-your-car.html
o_O huh? you must be smoking the good sht lol
 

TheSkygun

New Member
Wet sanding is a cleaner alternative to regular sanding of drywall mud from remodeling and repairs. Wet sanding requires a special sanding sponge that replaces the traditional drywall sanding screens and blocks. The sanding sponge is used barely damp and requires frequent rinsing and wringing during wet sanding.

Wet sanding is a great alternative to dry sanding when repairs have been made to damaged drywall or plaster, as well as in remodeling that occurs in or near lived-in areas of the home. In wet sanding, the sponge is damp enough to significantly reduce the amount of sanding dust that becomes airborne. For this reason, persons with allergies living through a remodel or repair may well appreciate this alternative technique. In high-use areas of the home such as kitchens or baths, wet sanding can significantly decrease the mess that normally accompanies drywall repair.

When properly executed, wet sanding does not alter the number of coats of drywall mud required, but the process does take longer than dry block sanding. This is mostly due to the number of times the sponge must be rinsed and wrung out, and depending on the size of the area, the water may need to be changed as well. You can reasonably expect to sand about a 3-foot square (about one square meter) section before needing to rinse and wring your sponge.

here'd how to do it for your car:http://carpaint.blogspot.com/2005/07/how-to-wet-sand-and-buff-your-car.html

huh, so i take it do the same thing for the lights as if it was the body. based on what link you sent said?


TheSkygun

New Member
Theres the front, probably going to pull all off at use the spray and wet-sanding way


was going to add a pic with the lights on but issue with editing it
 
Last edited:

TheSkygun

New Member
well got pulled over for the tail lights so i just pulled it right off to not get a ticket, guess im over that. ill stick to interior stuff to change
 
Top