Mishimoto
Product Manufacturer
How To Guide: Installing a Mishimoto Thermostat
Precautions
Never open the radiator cap/release pressure in the system when the car's engine is warm, or immediately after operating.
Note
This is to serve as a general guide. Keep in mind that each and every vehicle is somewhat different when installing a new thermostat. With that said, this install guide is being done on a Honda Civic, D16y8 motor.
Step 1 – Drain Coolant
Jack up the car. Usually, it is easier to drain the coolant when the front of the car is lower than the rear.
Remove radiator cap. Crawl under the car and open petcock to drain the coolant from the system. Once it is slowly dripping, you can squeeze the lower (and possibly the upper) hoses to get more of the coolant out. If you plan on re-using the coolant, have a clean drain pan underneath it.

Step 2 – Remove Lower Radiator Hose
Get a pair of pliers, loosen the metal clip, move it back and away from where the hose connects to the radiator.
Now, follow the lower radiator hose back to where it meets the block, and remove the metal clip the same way as before

And the hose should be off.

*Be sure to clean everything up, especially if it looks like this!*

Step 3 – Remove Thermostat Housing
Unplug the fan switch solenoid (green). Unbolt ground wire (white). Remove the two bolts holding the thermostat housing to the block (red).

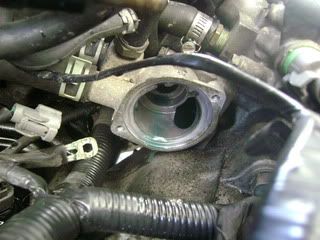
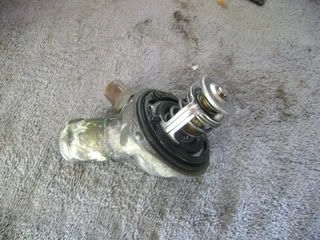
At this point, the housing should come off. This is what it looks like now after taking the thermostat out, too.


Step 4 – Putting It All Back Together
Line up the air release valve with the groove(s) on the thermostat housing and block.


Place Mishimoto Thermostat onto the block.

**NOTE: As stated above, all cars are different. Using some sort of sealant/gasket is not required for this application. Please check your owner’s manual to determine if you would need a gasket/sealant.**
Reinstall thermostat housing, fan switch, and lower radiator hose. Finally, close petcock on radiator.
Fill radiator with coolant, and bleed for air as instructed to by your owner’s manual.
Results?
Compared to the OEM thermostat, the Mishimoto 60ºC Thermostat opens at a lower temperature. Due to that, the car took about 3-4 minutes longer to reach operating temperature when sitting (idle).
When using the OEM thermostat, the normal operating temperature is right below the halfway mark on the water temperature gauge when going for a “spirited” drive.
Performing the same driving test, the Mishimoto 60ºC Thermostat held the car’s water temperature to sit at the 1/4 marking on the gauge.
-- We hope this was helpful! --
Precautions
Never open the radiator cap/release pressure in the system when the car's engine is warm, or immediately after operating.
Note
This is to serve as a general guide. Keep in mind that each and every vehicle is somewhat different when installing a new thermostat. With that said, this install guide is being done on a Honda Civic, D16y8 motor.
Step 1 – Drain Coolant
Jack up the car. Usually, it is easier to drain the coolant when the front of the car is lower than the rear.
Remove radiator cap. Crawl under the car and open petcock to drain the coolant from the system. Once it is slowly dripping, you can squeeze the lower (and possibly the upper) hoses to get more of the coolant out. If you plan on re-using the coolant, have a clean drain pan underneath it.
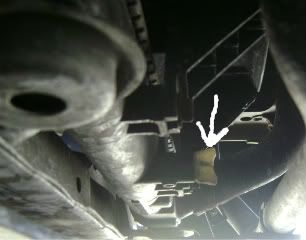
Step 2 – Remove Lower Radiator Hose
Get a pair of pliers, loosen the metal clip, move it back and away from where the hose connects to the radiator.
Now, follow the lower radiator hose back to where it meets the block, and remove the metal clip the same way as before
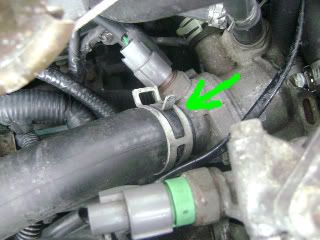
And the hose should be off.
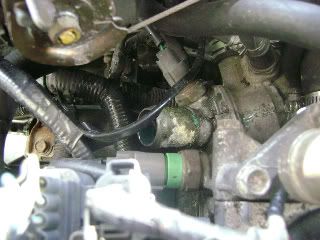
*Be sure to clean everything up, especially if it looks like this!*
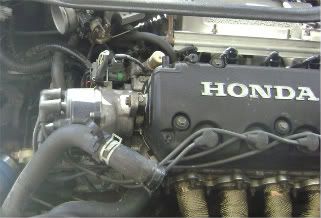
Step 3 – Remove Thermostat Housing
Unplug the fan switch solenoid (green). Unbolt ground wire (white). Remove the two bolts holding the thermostat housing to the block (red).
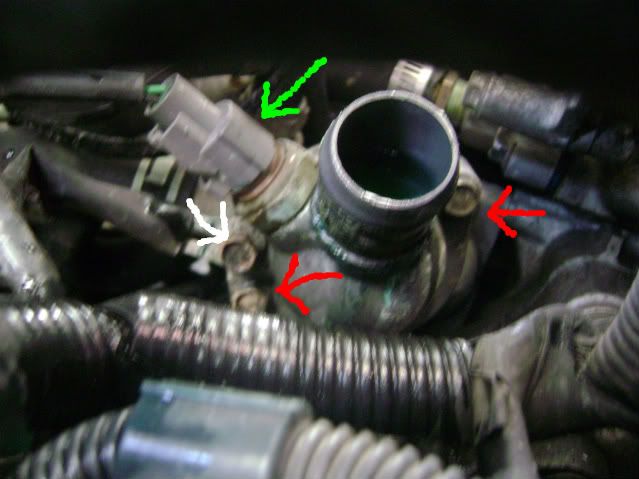
At this point, the housing should come off. This is what it looks like now after taking the thermostat out, too.
Step 4 – Putting It All Back Together
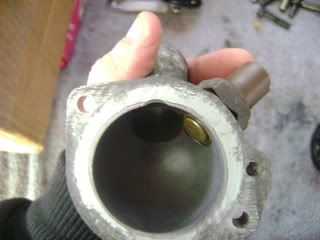
Line up the air release valve with the groove(s) on the thermostat housing and block.
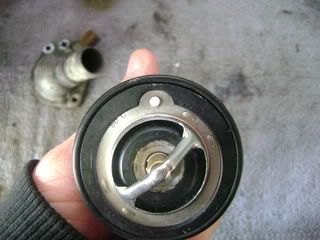
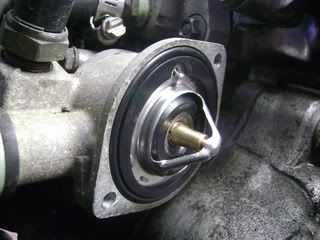
Place Mishimoto Thermostat onto the block.
**NOTE: As stated above, all cars are different. Using some sort of sealant/gasket is not required for this application. Please check your owner’s manual to determine if you would need a gasket/sealant.**
Reinstall thermostat housing, fan switch, and lower radiator hose. Finally, close petcock on radiator.
Fill radiator with coolant, and bleed for air as instructed to by your owner’s manual.
Results?
Compared to the OEM thermostat, the Mishimoto 60ºC Thermostat opens at a lower temperature. Due to that, the car took about 3-4 minutes longer to reach operating temperature when sitting (idle).
When using the OEM thermostat, the normal operating temperature is right below the halfway mark on the water temperature gauge when going for a “spirited” drive.
Performing the same driving test, the Mishimoto 60ºC Thermostat held the car’s water temperature to sit at the 1/4 marking on the gauge.
-- We hope this was helpful! --
Last edited:
