graveyardhippie
New Member
8)
Ok. lowered my front end last night. i shall attempt to give you step by step instructions on how to. write back with questions in case i forget a step. and i didnt have access to the camera last night, but later today i'll put up some after pix, and try to be descriptive enough for anyone to do this themselves. i've found a few people telling you how to do it, but no walk thru's so i'm gonna try to save everyone my headaches with this.
first, here are some tools you'll need.
1. ratchet
2. 12mm socket
3. 17mm deep well socket
4. snap ring pliers
5. small metal hammer
6. jack
7. 2 jack stands
8. crowbar (depending on your rust value)
9. long flat blade screw driver (unless you find an easier way)
10. PB Blaster
11. flat file
WARNING: the end of the torsion bar in the LCA likes to slide forward, and the snap ring on it is a major pain to get back inside the LCA. DO NOT let it come out during this procedure, it can waste a lot of your time
and here's the easiest procedure i've found.
Removal
1. jack it up, and put the stands on both of the front sides under the door and remove the wheels.
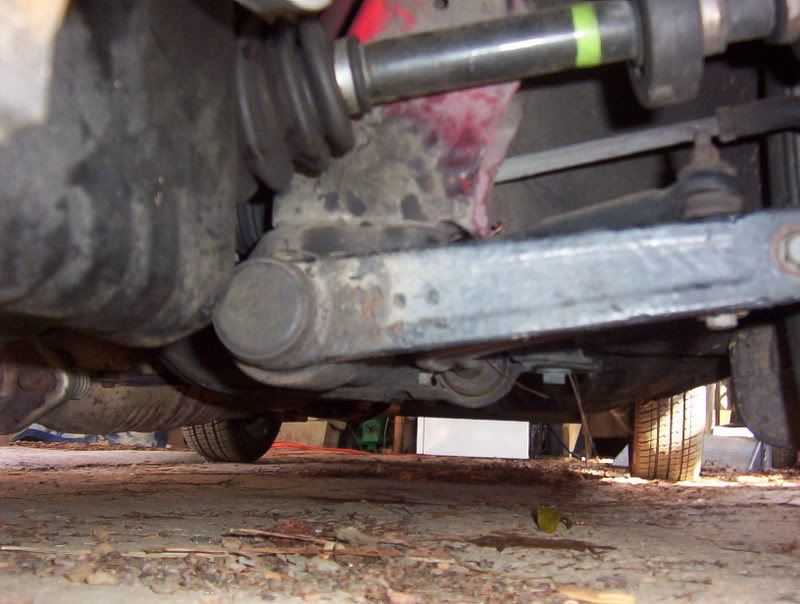
2. remove the dust cap on the lower control arms (LCA)

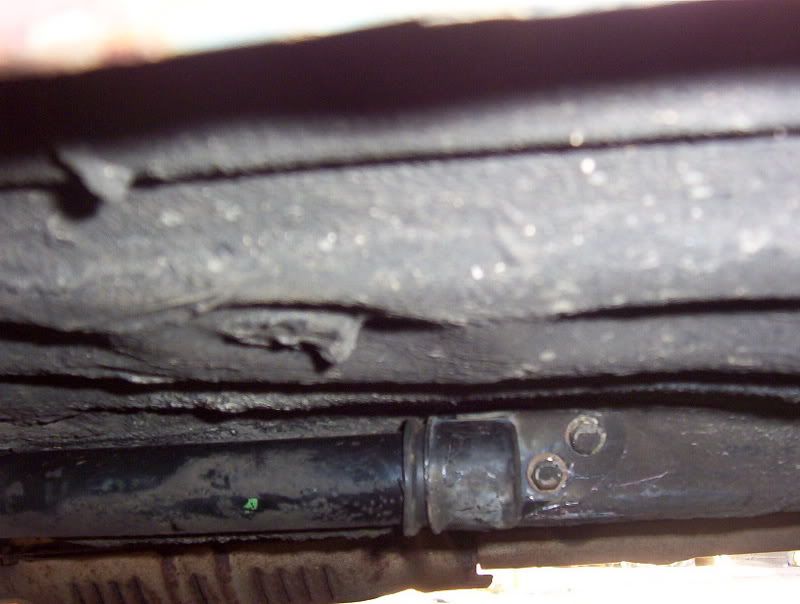
3. under the doors and bolted to the sub-frame you'll find the back end of the torsion bar inside the torque tube.
 unbolt the 12mm bolts and i used a screw driver in various ways to manipulate the glorified dust cap off. maybe you can find an easier way.
4. using your trusty snap ring pliers, take off the back snap ring.
5. spray the end of the torsion bar with PB Blaster. unless your fortunate enough to still have grease on the end....... i wasnt.
6. using your deep well 17mm, remove the adjusting nut. dont worry about pressure, the torque tube arm extends all the way down with a couple threads left on the bolt.
7. shimmy the torque tube off the back end of the torsion bar. it's only as long as from the back cap to the cross member, that flared out piece is part of the LCA. but on my passenger side, this is where i had to use a crowbar between the cross member and arm of the torque tube to pry it off the torsion bar.
8. you will notice what is called a key on the torque tube. it's just a wider spline than the rest. you can either file it completely off, or i just filed a groove str8 down the middle of them and made it the same size as the other splines. oddly enough, that was quicker and easier for me than trying to file it all the way down. i just used the angle of the file and it took about 5 mins or so.
9. take a break, the next part sux.
Install
Helpful Hints: putting it back where the key was keeps it stock height.
putting it one spline up lowers it.
putting it two splines up lowers it a lot.
 (note that this is with the adjustment all the way up...meaning it can go lower)
putting it three splines up is impossible as the height adjustment nut cant move enough to get the arm from the torque tube past it, and even if it could, it would probably lay frame.
while putting the torque tube on, you may have to tap the front of the torsion bar every so often to keep the snap ring from coming out.
1. put a jack under the brake rotor of the sid your working on and jack it up until the strut is fully compressed. it makes finding the height you want easier.
2. slide the torque tube mostly over the torsion bar, but be careful not to pust the torsion bar forward. (see warning)
3. you pretty much have to feel your way thru this part and do trial and error. you have to get the splines to match up without making the car too low, or higher than you started. once matched how you want it, slide the torque tube all the way on and keep moving the height adjustment nut around so that you dont pinch it while installing the torque tube.
4. let the brake rotor down enough to start the height adjustment nut.
5. let down the brake rotor and tighted the height adjustment nut up all the way. i used a hydraulic jack under my rotor and turn the screw to drop it out just a little so it would go down about the same speed i was tightening the nut so that the bolt didnt have too much free room to make putting the nut on aggrevating
6. put your dust cap back on the LCA
7. put the glorified dust cap back on the back of the torque tube. (mine required a lot of hammering)
8. put your 12mm bolts back on the glorified dust cap.
9. take the jackstands out, put the wheels on, and drop it.
Ok. lowered my front end last night. i shall attempt to give you step by step instructions on how to. write back with questions in case i forget a step. and i didnt have access to the camera last night, but later today i'll put up some after pix, and try to be descriptive enough for anyone to do this themselves. i've found a few people telling you how to do it, but no walk thru's so i'm gonna try to save everyone my headaches with this.
first, here are some tools you'll need.
1. ratchet
2. 12mm socket
3. 17mm deep well socket
4. snap ring pliers
5. small metal hammer
6. jack
7. 2 jack stands
8. crowbar (depending on your rust value)
9. long flat blade screw driver (unless you find an easier way)
10. PB Blaster
11. flat file
WARNING: the end of the torsion bar in the LCA likes to slide forward, and the snap ring on it is a major pain to get back inside the LCA. DO NOT let it come out during this procedure, it can waste a lot of your time
and here's the easiest procedure i've found.
Removal
1. jack it up, and put the stands on both of the front sides under the door and remove the wheels.
2. remove the dust cap on the lower control arms (LCA)

3. under the doors and bolted to the sub-frame you'll find the back end of the torsion bar inside the torque tube.

4. using your trusty snap ring pliers, take off the back snap ring.
5. spray the end of the torsion bar with PB Blaster. unless your fortunate enough to still have grease on the end....... i wasnt.
6. using your deep well 17mm, remove the adjusting nut. dont worry about pressure, the torque tube arm extends all the way down with a couple threads left on the bolt.
7. shimmy the torque tube off the back end of the torsion bar. it's only as long as from the back cap to the cross member, that flared out piece is part of the LCA. but on my passenger side, this is where i had to use a crowbar between the cross member and arm of the torque tube to pry it off the torsion bar.
8. you will notice what is called a key on the torque tube. it's just a wider spline than the rest. you can either file it completely off, or i just filed a groove str8 down the middle of them and made it the same size as the other splines. oddly enough, that was quicker and easier for me than trying to file it all the way down. i just used the angle of the file and it took about 5 mins or so.
9. take a break, the next part sux.
Install
Helpful Hints: putting it back where the key was keeps it stock height.
putting it one spline up lowers it.
putting it two splines up lowers it a lot.

putting it three splines up is impossible as the height adjustment nut cant move enough to get the arm from the torque tube past it, and even if it could, it would probably lay frame.
while putting the torque tube on, you may have to tap the front of the torsion bar every so often to keep the snap ring from coming out.
1. put a jack under the brake rotor of the sid your working on and jack it up until the strut is fully compressed. it makes finding the height you want easier.
2. slide the torque tube mostly over the torsion bar, but be careful not to pust the torsion bar forward. (see warning)
3. you pretty much have to feel your way thru this part and do trial and error. you have to get the splines to match up without making the car too low, or higher than you started. once matched how you want it, slide the torque tube all the way on and keep moving the height adjustment nut around so that you dont pinch it while installing the torque tube.
4. let the brake rotor down enough to start the height adjustment nut.
5. let down the brake rotor and tighted the height adjustment nut up all the way. i used a hydraulic jack under my rotor and turn the screw to drop it out just a little so it would go down about the same speed i was tightening the nut so that the bolt didnt have too much free room to make putting the nut on aggrevating
6. put your dust cap back on the LCA
7. put the glorified dust cap back on the back of the torque tube. (mine required a lot of hammering)
8. put your 12mm bolts back on the glorified dust cap.
9. take the jackstands out, put the wheels on, and drop it.
Last edited:

