DailyDB8
>>>Honda Enthusiast<<<
Gauge Cluster Swap: DC/DB Integra w/ S2000 Cluster + ETC. [Still in the WORKs!]
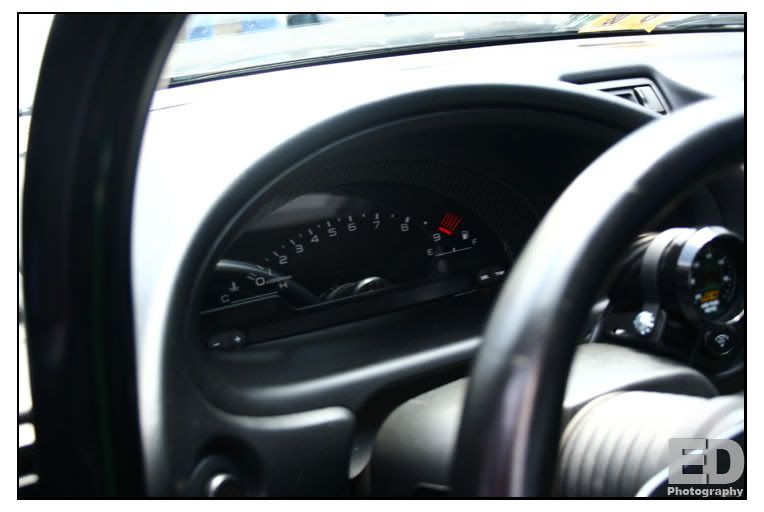
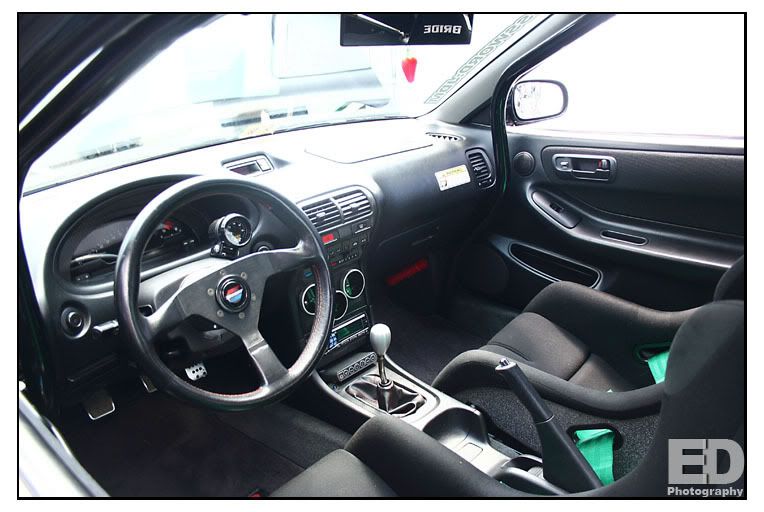
Club-Integra doesn't have a lot of how to's, so lets get the ball rolling. Ever Since i saw this article of a white crx on jtuned.com... i told my self it was definately something i wanted to have. I like the way the AP1 cluster looks... more feng shui, lol.. way better than the AP2, but sometimes i think the layout of the AP2 is easier to view from a racers point of view. but eh... watevers. This project isn't going to be any walk in the park, lots of custom stuff involved depending on what you want to buy or make. Harness, Bezel, Temp and Speedo Converter.
Project: Honda AP1 S2000 Cluster inside a DC/DB Integra Dash
Tools/Equipment:
Solder Iron
Dremel [ Cutter Disc & Drill ]
Phillip & Flathead Screwdriver
Wire Cutters / Crimper
Gloves + Face Mask + Eye Protection ( cause you're going to be cutting the carbon fiber... 10x ichier than fiberglass ]
Black Marker [ but any color will do ]
Masking Tape
JB Weld
misc Bolts/Washers/Spacers [ more details on that once completed ]
Parts/Cost:
AP1 S2000 Gauge Cluster w/ Pigtails
DC Integra Gauge Cluster [ Donor for parts ]
DC Integra Cluster Bezel
Carbon Fiber Layout for Bezel 6x14
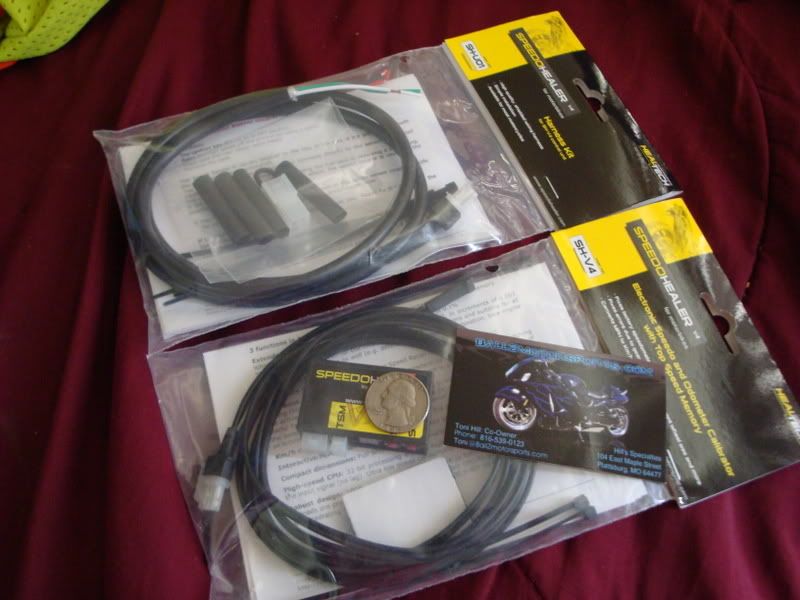
SpeedoHealer Converter V.4
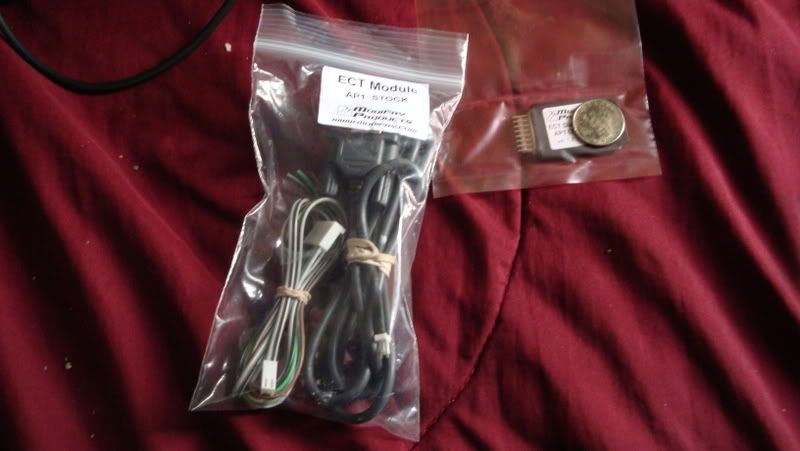
Modifry's ECT Mod [ OEM ]
Wiring DiagramSchematics:
94-99 DC/DBAcura Integra Gauge Cluster Pinout - plugs going left to right, pinouts labeled from left to right
Steps/Proceedure:
#1
[[ The BEZEL ]]
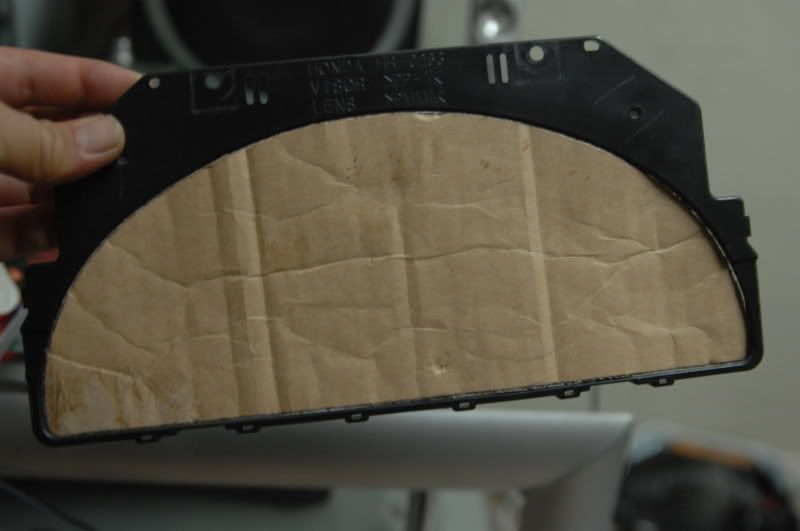
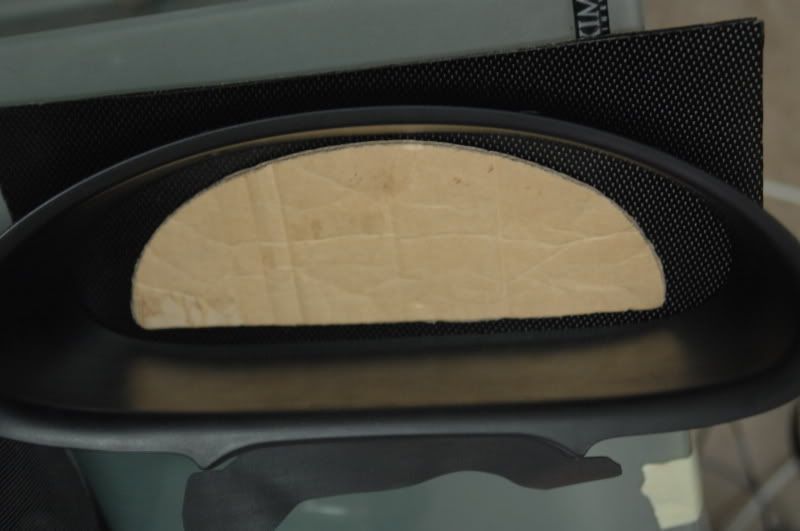
here's a cut out of the s2k cluster face, perfect cut out too, i shoulda kept the other side of the cut out, but i think i threw it out long ago when i made the template.

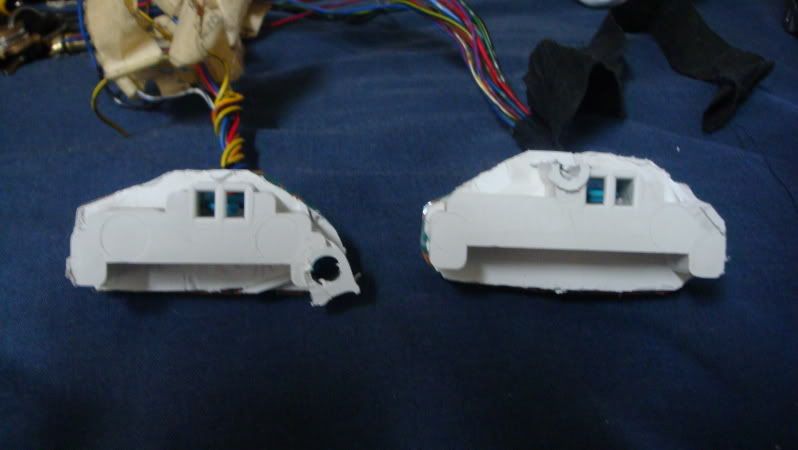
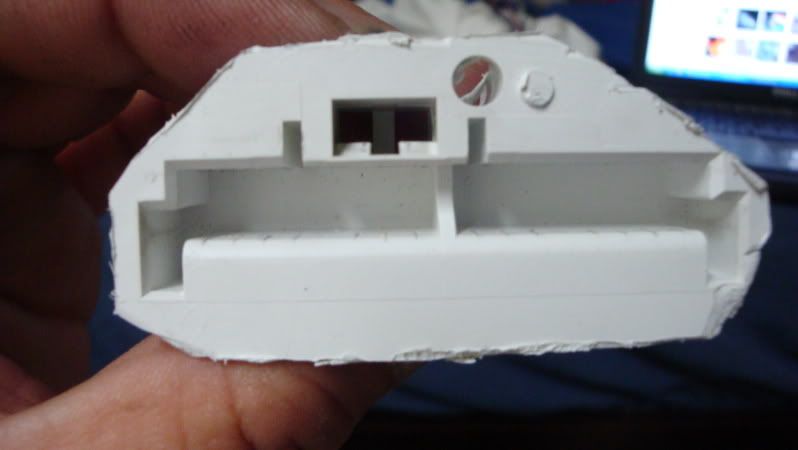
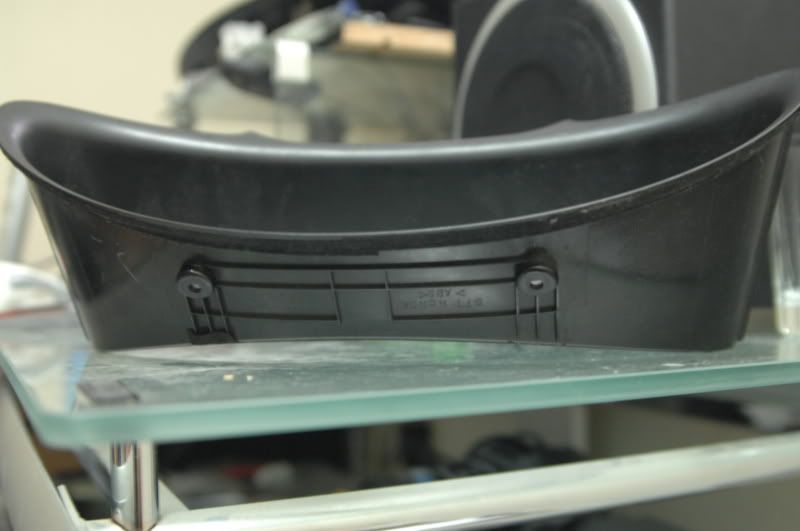
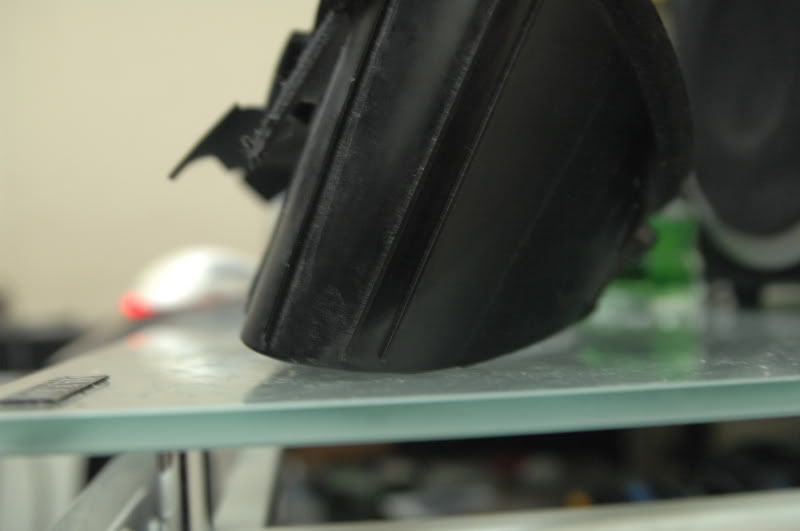
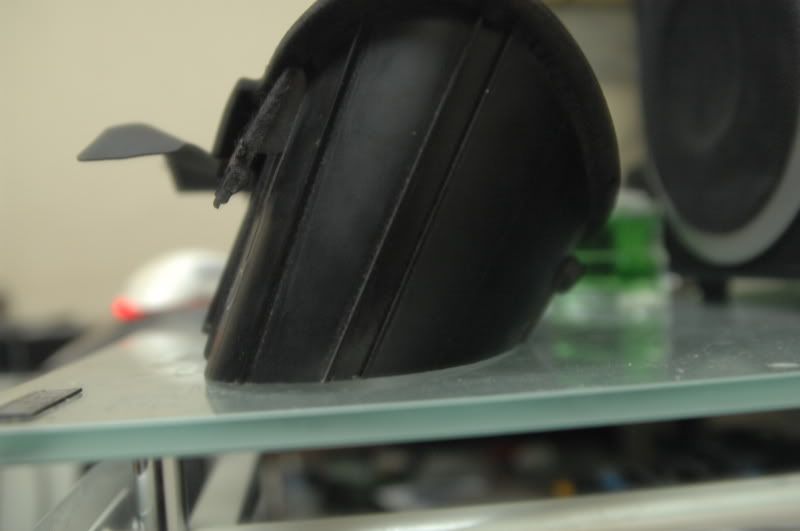
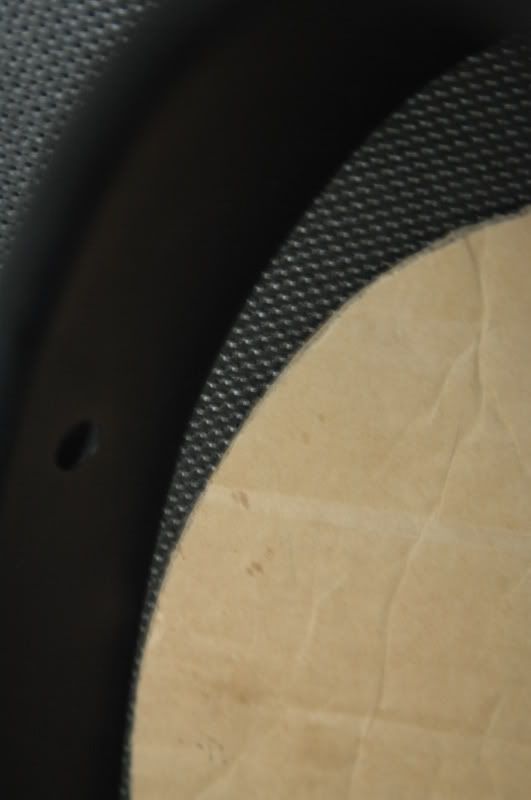
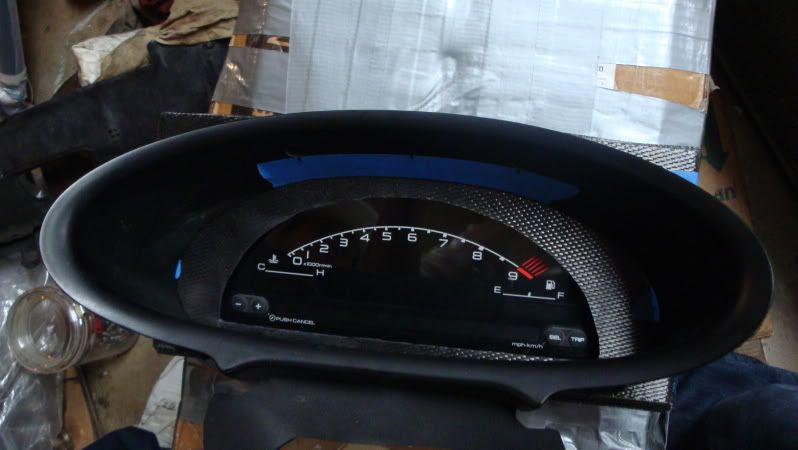
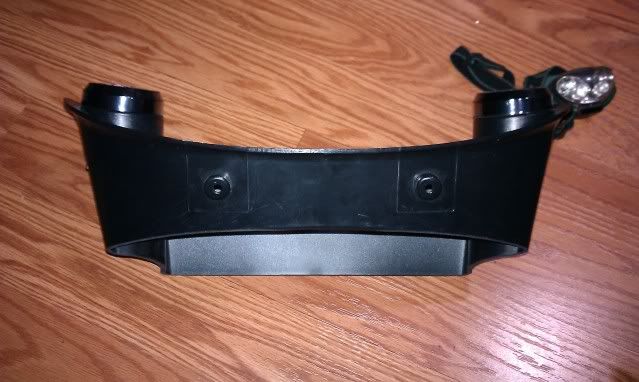
here's the problem with the integra bezel, its too curvy for anything to lay against it... so instead i grinded it down. i took pictures of both for comparison.
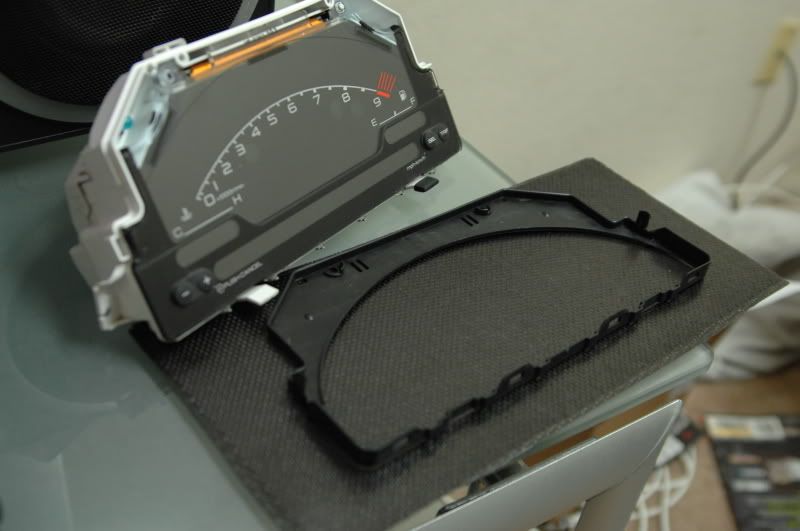
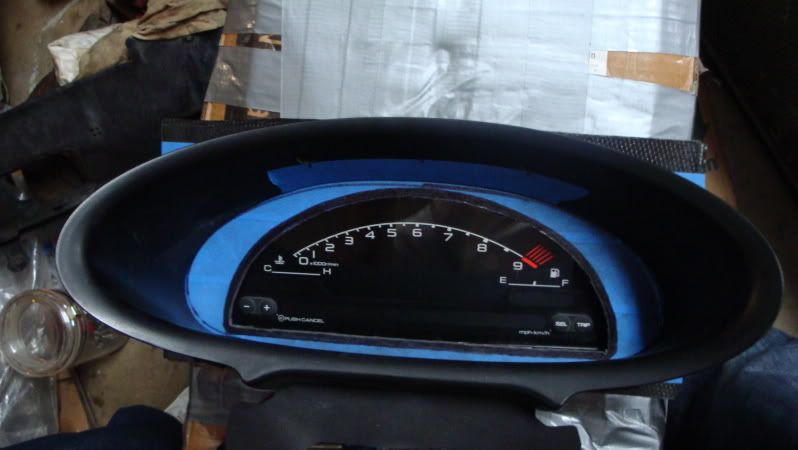
this is pretty much what its goign to end up being cut out. what do you guys think? its not like i have any other spots to locate/position the cluster... lol
so getting a white pen, making an outline... and buying some fine discs for the dremel will be the next task to get it going. Im not quite sure if i will use that black trimming on the s2k cluster... cause i might just screw the carbon fiber panel to it... we'll see when we get that far. :thumbup:
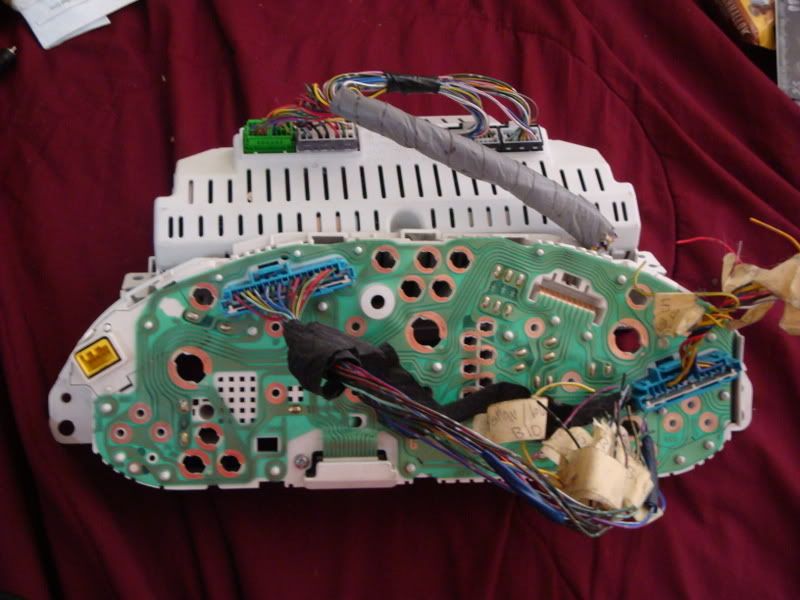
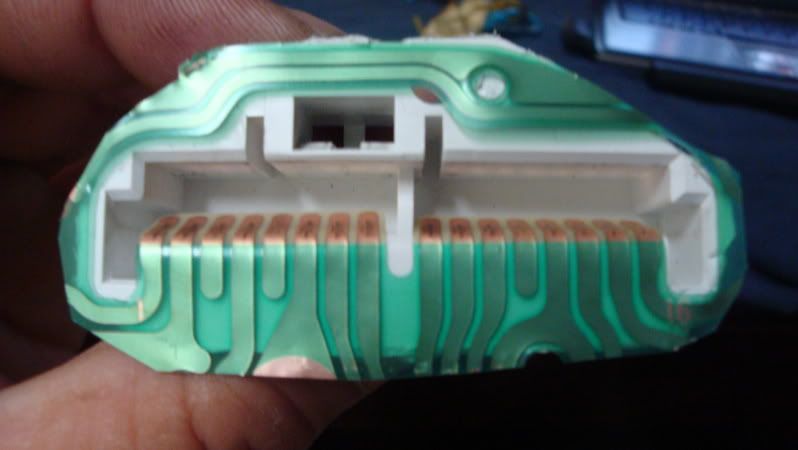
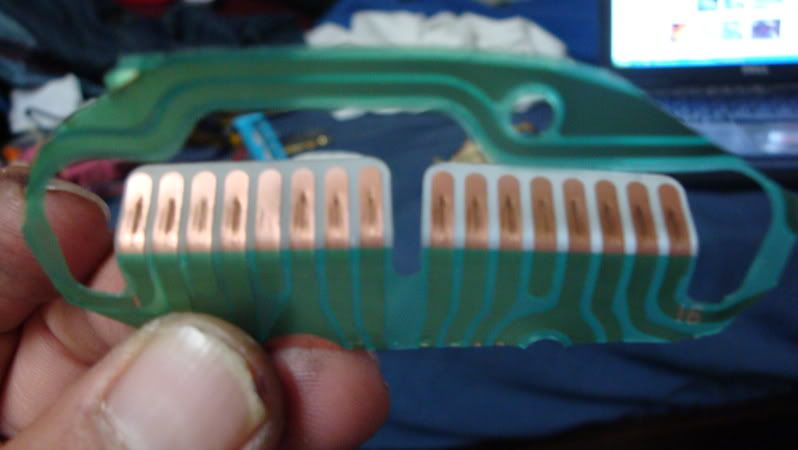
i ordered a dremel the other day... saved a couple bucks, but they dont cost that must at home depot. saw it the other day while i was at work looking for parts. So with the dremel kit and using the fhick cutting disc, i chopped away at the donter cluster for the custom harness i wanna make, and also the carbon fiber bezel. with the variable speed on the dremel... cutting through the plastic was like butter!
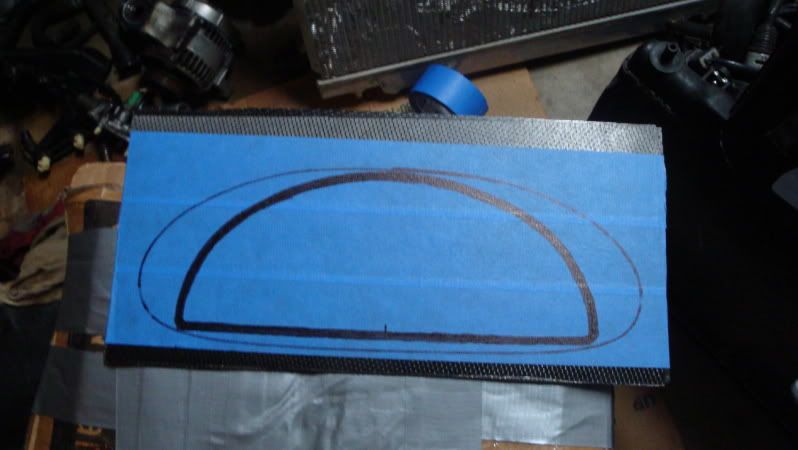
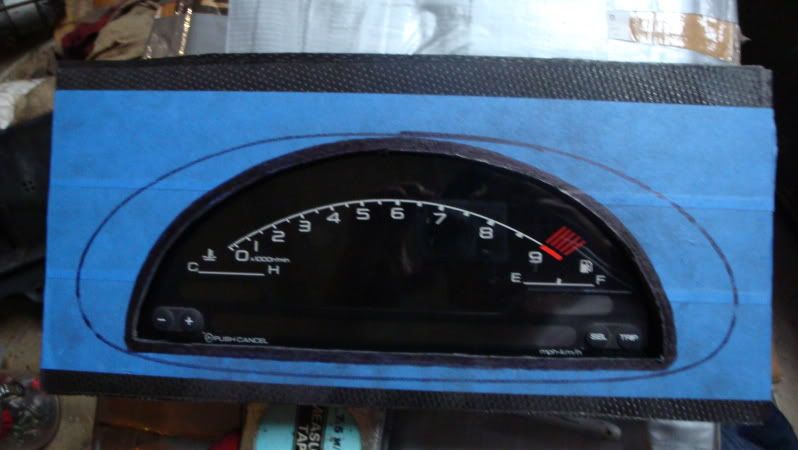
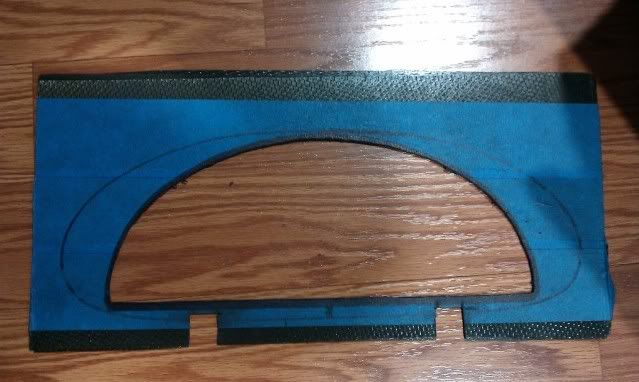
make sure you wear gloves, eye protection, and long sleeves! cause that b**** is some ichy stuff! lol... no joke. a stream of watter isn't really needed to keep the carbon fiber dust down... its nothing too krazy. man up about it, haha. placing tape on the panel will make things a lot easier to decide where to start cutting, i centered and traced the card board cut out i made, as well as the plaster bezel, just to get a better visual. i made the outline thicker going towards the center, so i can give myself room for error and use the sander for the demel to smooth it out.
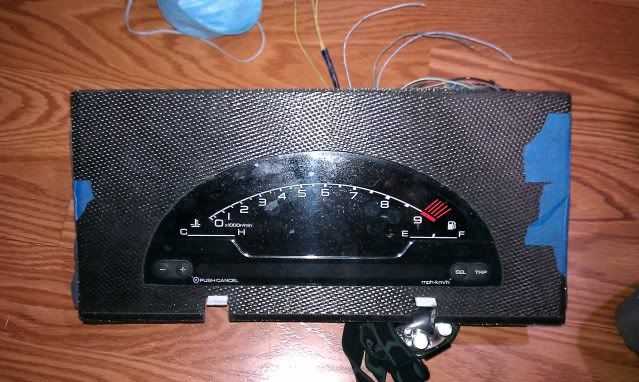
and then chop chop away! i went
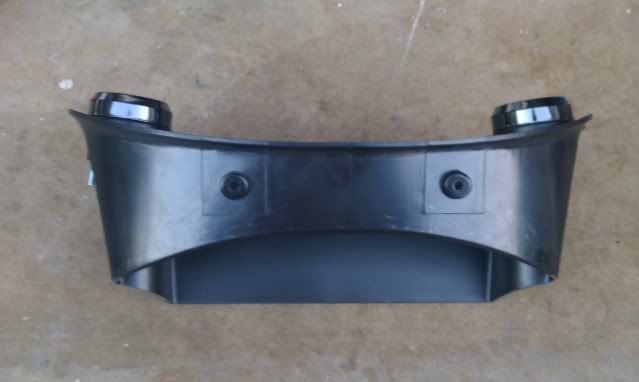
updated with the dual pods.
finding a way to mount the cluster is next... i want to fab some solid brackets possibly or use the multipurpose metal mounting strips, also think i need to find me a mil-spec connector... pretty sure that'll solve my dilemma with the cutting and splicing if i ever decided to throw the OE cluster back on. :what: not sure if i already mentioned it, with the extra space on the overlay, i can probably mount the speedohealer and the modifry on it.
there's still a large portion where i need to trim the rest of the surrounding carbon fiber to make it more compact... but i can also use it as mounts of the speedohealer and ect mod. also the center trim that i cutt out... i was sorta thinking about using it as a cover like the dc2 clock cover... muahahaha 8) the carbon fiber layout sorta looks like the carbon faux for the integra type r interior... so thats also next to list to complete my interior
SPECIAL THANKs To:
Kong aka Konerri [ ClubIntegra ]
Jeremy aka itzjere [ ClubRSX ]
MarkLamond
Anyone that has pics, info, advice, suggestions, comments, feel free to chime in! :thumbup:
**NOTE- THE WRITE-UP IS STILL IN THE WORKs** - once project is completed there will be a more detailed write up, so as of right now, im doing a lilttle more research before i "wing" it... lol. so any tips / help / advice is appreciated! :thumbup:
Club-Integra doesn't have a lot of how to's, so lets get the ball rolling. Ever Since i saw this article of a white crx on jtuned.com... i told my self it was definately something i wanted to have. I like the way the AP1 cluster looks... more feng shui, lol.. way better than the AP2, but sometimes i think the layout of the AP2 is easier to view from a racers point of view. but eh... watevers. This project isn't going to be any walk in the park, lots of custom stuff involved depending on what you want to buy or make. Harness, Bezel, Temp and Speedo Converter.
Project: Honda AP1 S2000 Cluster inside a DC/DB Integra Dash
Tools/Equipment:
Solder Iron
Dremel [ Cutter Disc & Drill ]
Phillip & Flathead Screwdriver
Wire Cutters / Crimper
Gloves + Face Mask + Eye Protection ( cause you're going to be cutting the carbon fiber... 10x ichier than fiberglass ]
Black Marker [ but any color will do ]
Masking Tape
JB Weld
misc Bolts/Washers/Spacers [ more details on that once completed ]
Parts/Cost:
AP1 S2000 Gauge Cluster w/ Pigtails
DC Integra Gauge Cluster [ Donor for parts ]
DC Integra Cluster Bezel
Carbon Fiber Layout for Bezel 6x14
SpeedoHealer Converter V.4
Modifry's ECT Mod [ OEM ]
Wiring DiagramSchematics:
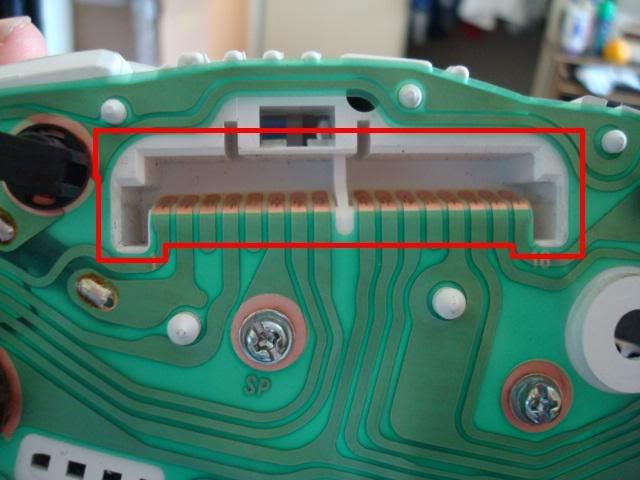
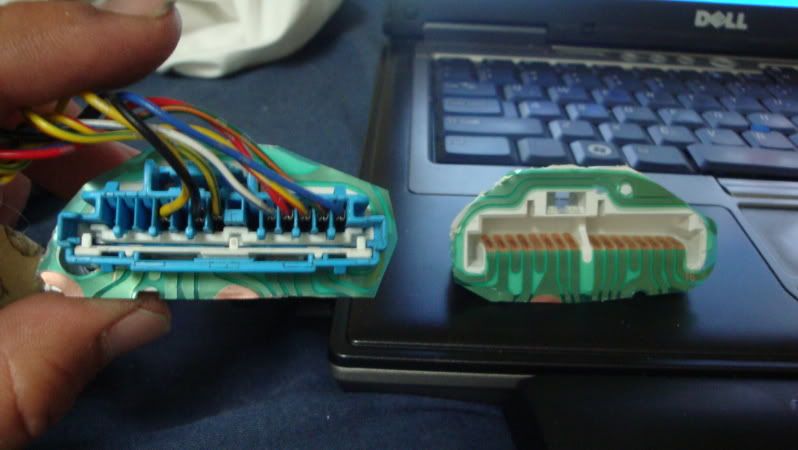
94-99 DC/DBAcura Integra Gauge Cluster Pinout - plugs going left to right, pinouts labeled from left to right
2000-2003 AP1 Honda S2000 Gauge Cluster Pin-Out - plugs going left to right, pinouts labeled from left to rightNOTE:OBD1 & OBD2 Varies with some pin outs. be sure to check the manual.
Plug A) 16-Pin
1. Seat Belt Indicator // [Red/Blue]
2.
3. Fuel Gauge // [Yellow/White]
4.
5.
6. Vss // [Orange]
7. Trunk Indicator // [Green]
8.
9. Dash Brightness // [Red]
10. Gauge Lights // [Red/Black]
11. 12v Power // [Black/Yellow]
12.
13. Left Turn Indicator // [Green/Blue]
14. Right Turn Indicator // [Green/Yellow]
15. High Beam Indicator // [Red/Green]
16. E-Brake Indicator // [Green/Red]
Plug B) 13-Pin
1.
2.
3.
4. 12v Power // [Yellow]
5.
6. Ground // [Black]
7. Coolant Temp // [Yellow/Green]
8.
9. Battery Indicator // [White/Blue]
10.
11. Oil Pressure // [Yellow/Red]
12. Check Engine Indicator // [Green/Orange]
13. Tachometer // [Blue]
Plug A) 14-Pin
1. Seat Belt // [Blue/Red]
2. Empty
3. Empty
4. SRS // [Pink]
5. DRL Indicator // [Blue/White]
6. Fuse 5, 7.5a // [Yellow]
7. Left Turn Indicator // [Green/Red]
8. Right Turn Indicator // [Green/Yellow]
9. High Beam Indicator, Feed // [Red/Yellow]
10. High Beam Indicator, Input // [Red/Blue]
11. Trunk Indicator // [BlueBlack]
12. Empty
13. Empty
14. EPS Indicator // [Yellow/Blue]
Plug B) 12-Pin
1. Door Open Indicator // [Black/White]
2. Rear Fog Light // [Red/Yellow]
3. Illumination Signal, Tail Light Relay // [Red/Back]
4. +12v Ignition // [Yellow]
5. +12v Battery // [White/Red]
6. Drivers Door Switch input // [Green]
7. Passengers Door Switch Input // [Green/Red]
8 GROUND
9. GROUND
10. Dash & Console Lights Output // [Red]
11. Intermittent Wiper Out // [Green]
12. Rear Fog Light Relay Output // [Green/Red]
Plug C) 20-Pin
1.Vechile Speed Pulse Output // [White/Black]
2. Ingnition Key Siwtch Input // [Red/White]
3. Vss Input // [Blue/White]
4.
5. Tachometer Input // [Blue]
6. Heater Control Illumination // [Black/White]
7. Engine Temp Input // [Yellow/Green]
8. Fuel Gauge Input // [Yellow/Black]
9.
10.
11. Wiper Position Input // [Blue/Orange]
12. Intermittent Wiper Request Input // [Blue/Black]
13. Washer Request Input // [White/Black]
14. Rear Fog Light Switch Input // [Blue/White]
15. Cruise Control Indicator // [Blue/Yellow]
16.
17.
18.
19.
20.
Plug D) 16-Pin
1.
2.
3.
4.
5.
6.
7.
8. ABS Indicator, GND=off // [Blue/Red]
9. Parking Brake Switch Input // [Green/White]
10. Brake System Indicator // [Green/Red]
11. Charging System Indicator // [White/Blue]
12. Charving System Indicator, FEED // [Black/Yellow]
13. Oil Pressure Indicator // [Yellow/Red]
14. Check Engine Indicator // [Green/Orange]
15. Immobiliser Indicator // [Pink]
16. Immobiliser Indicator, FEED // [White/Red]
Steps/Proceedure:
#1
[[ The BEZEL ]]
here's a cut out of the s2k cluster face, perfect cut out too, i shoulda kept the other side of the cut out, but i think i threw it out long ago when i made the template.
here's the problem with the integra bezel, its too curvy for anything to lay against it... so instead i grinded it down. i took pictures of both for comparison.

this is pretty much what its goign to end up being cut out. what do you guys think? its not like i have any other spots to locate/position the cluster... lol
so getting a white pen, making an outline... and buying some fine discs for the dremel will be the next task to get it going. Im not quite sure if i will use that black trimming on the s2k cluster... cause i might just screw the carbon fiber panel to it... we'll see when we get that far. :thumbup:
i ordered a dremel the other day... saved a couple bucks, but they dont cost that must at home depot. saw it the other day while i was at work looking for parts. So with the dremel kit and using the fhick cutting disc, i chopped away at the donter cluster for the custom harness i wanna make, and also the carbon fiber bezel. with the variable speed on the dremel... cutting through the plastic was like butter!
make sure you wear gloves, eye protection, and long sleeves! cause that b**** is some ichy stuff! lol... no joke. a stream of watter isn't really needed to keep the carbon fiber dust down... its nothing too krazy. man up about it, haha. placing tape on the panel will make things a lot easier to decide where to start cutting, i centered and traced the card board cut out i made, as well as the plaster bezel, just to get a better visual. i made the outline thicker going towards the center, so i can give myself room for error and use the sander for the demel to smooth it out.
and then chop chop away! i went
updated with the dual pods.
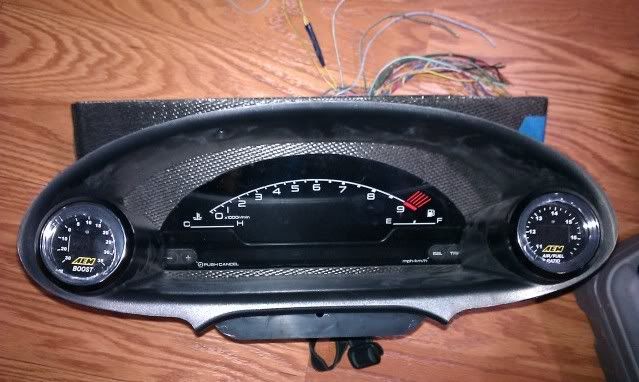
finding a way to mount the cluster is next... i want to fab some solid brackets possibly or use the multipurpose metal mounting strips, also think i need to find me a mil-spec connector... pretty sure that'll solve my dilemma with the cutting and splicing if i ever decided to throw the OE cluster back on. :what: not sure if i already mentioned it, with the extra space on the overlay, i can probably mount the speedohealer and the modifry on it.
there's still a large portion where i need to trim the rest of the surrounding carbon fiber to make it more compact... but i can also use it as mounts of the speedohealer and ect mod. also the center trim that i cutt out... i was sorta thinking about using it as a cover like the dc2 clock cover... muahahaha 8) the carbon fiber layout sorta looks like the carbon faux for the integra type r interior... so thats also next to list to complete my interior
SPECIAL THANKs To:
Kong aka Konerri [ ClubIntegra ]
Jeremy aka itzjere [ ClubRSX ]
MarkLamond
Anyone that has pics, info, advice, suggestions, comments, feel free to chime in! :thumbup:
Last edited: