Disco
New Member
I cant find my old posts so I guess I gotta start from scratch. Ive been gone from the site for a long time due to a huge carreer and life change. I had to leave the family remodeling business due to lack of work, and I got a great job as a performance tech at the best tuning shop in my local area. Its a 40 min drive but its well worth it to be able to do what I love. SO back to the subject at hand.
I've been running my current NOS wet kit for about a year now and have reached it's max abilities at a 100 shot. We've dynoed and tuned everything we could get outta the wet kit and now it's time for more spray. The most effective way to increase the ammount of nitrous one can spray into their motor is through a direct port kit. The direct port kit sprays both fuel and nitrous directly into each intake manifold runner providing maximim HP and effectiveness. Since I already have my current wet kit there's no need to buy another bottle which can be quite costly. The main feed line from the bottle to the solonoids is also something else that can be reused. A tee fitting will be needed at both the current fuel slpitter and the nitrous feed line before the solonoids. Of course a preassembled direct port kit is the way to go, with all the nessesarry fittings and lines included. I personally would prefer to use stainless braided lines from the foggers to the distribution blocks but the cost goes through the roof. Just to buy the 8 braided lines needed to plumb the kit its an extra $240. So im going to try my hand at bending the hard lines that come with the kit. I have a tubing bender that NOS sells just for this purpose, I'm sure patience will be the key to getting it right and asthetically pleasing.
I started by removing my aftermarket Blox (skunk knockoff) intake manifold. If you can't do this step without a how to tutorial you probably have no business installing a direct port kit. Once the intake manifold is off the car, it's a good idea to tape over the runners in the head to keep any debris or small critters out of your engine.
Once the intake mani is off the engine, it's time to start mocking up where you want everything to go. Like where the foggers will sit with no clearance issues from the fuel rail or misc sensors. In my case I had to relocate the intake air temp sensor to the back of the manifold by drilling three holes and remounting it. Then since I wanted all the lines on top of the mani instead of under it, I also had to ensure that the fuel rail would come off and on without contacting the foggers or lines. Once I determined where I wanted the foggers to sit I discovered a few slight clearance issues. After a few slight modifications to the manifold I was back in business.
Some people opt to put all the foggers and lines under the manifold to keep the engine bay cleaner looking but it makes servicing the system a major pain. Also the jets would be under the mani making them very hard to change on the fly. With all the plumbing on top of the mani I make all the changes I want quickly and easily.
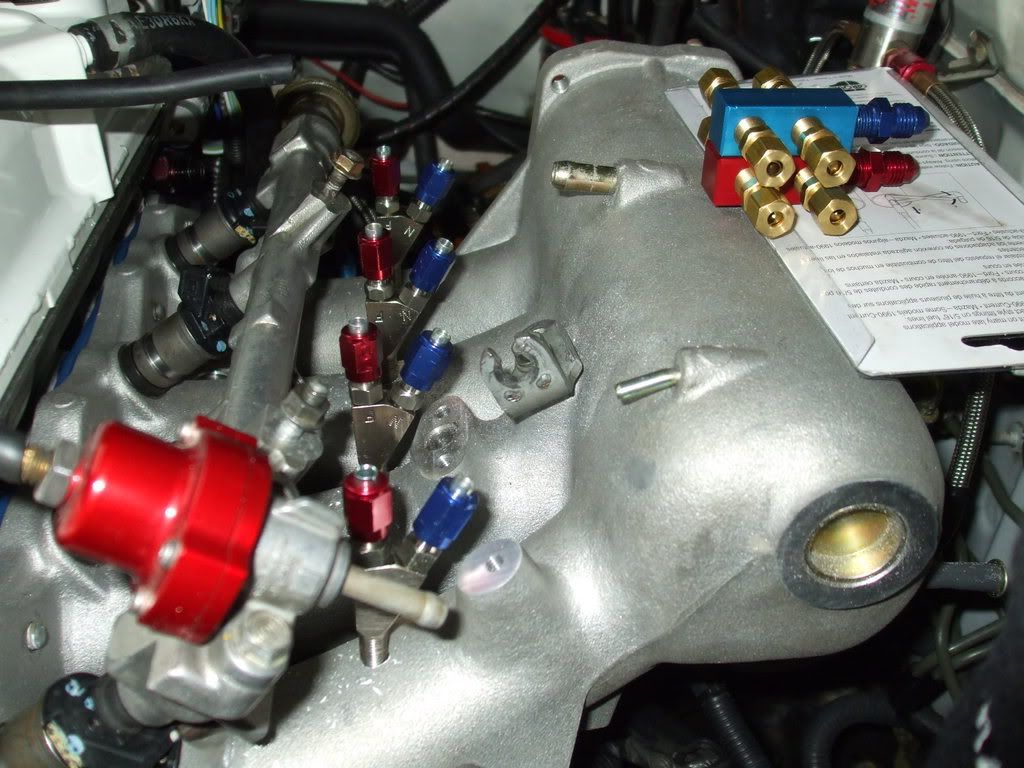
Next I measured the postions for the foggers and marked them with a sharpie. I predrilled a divit into the marked spot with a small bit and then proceded to drill the hole just a slight bit smaller than the foggers threads so tomorrow I can tap the soft aluminum to match the foggers threads. (I gotta go buy a tap tomorrow) With the foggers sitting at just the right angle it was time to figure out where I want the distribution blocks. For my needs im going to have them hover right over the top of the intake manifold. This will get the hard lines as short as possible and ill have to make the least amount of bends.
Here's a shot of the foggers in place and the distribution blocks in their general area.

In typical "Disco" fasion this small job just turned large. With all the projects I undertake with my Integra there are always a couple little thing that need to be adressed either for function or form. While setting up my direct port kit to go in I have seen a few little thing that need to be changed out to make the engine bay both less cluttered and more convient.
Example. The huge bulky fuel filter is in the perfect place for me to mount my fuel solonoids to get them out from behind the intake mani where alot of heat builds up. Heat near fuel solonoids = bad day. So what's the solution? Buy an inline fuel filter just like the kind that you can buy for your nitrous kit right? Yes. But if I'm going to do that then I may as well change all the lines out to braided stainless and put the nessesary fittings in place to accept my fuel pressure gauge and three more outputs. One for the fuel rail and two more for fuel solonoids.
So now I've got to make a new bracket to mount the solonoids and the new fuel filter to in the place of the current fuel filter position and buy a whole crap load of expensive braided lines and fittings. At least I'll know I did it a right as I could when it's done.
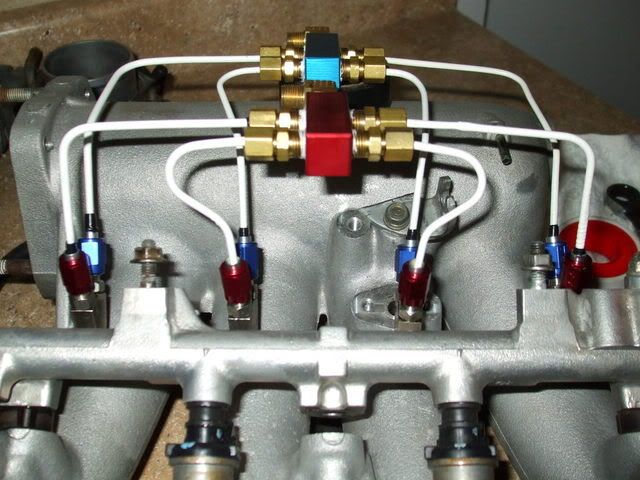
I mocked up the bends tonight with some rubber coated white hangers so I could make all the bends without ruining the tubing the kit came with. Now that the bends are made with hangars I can copy them with the tubing. Here's the best set up I could create and keep all the bends mellow. The lines aren't exactly like they will be when it's done. There are a couple bends that need minor adjustments.

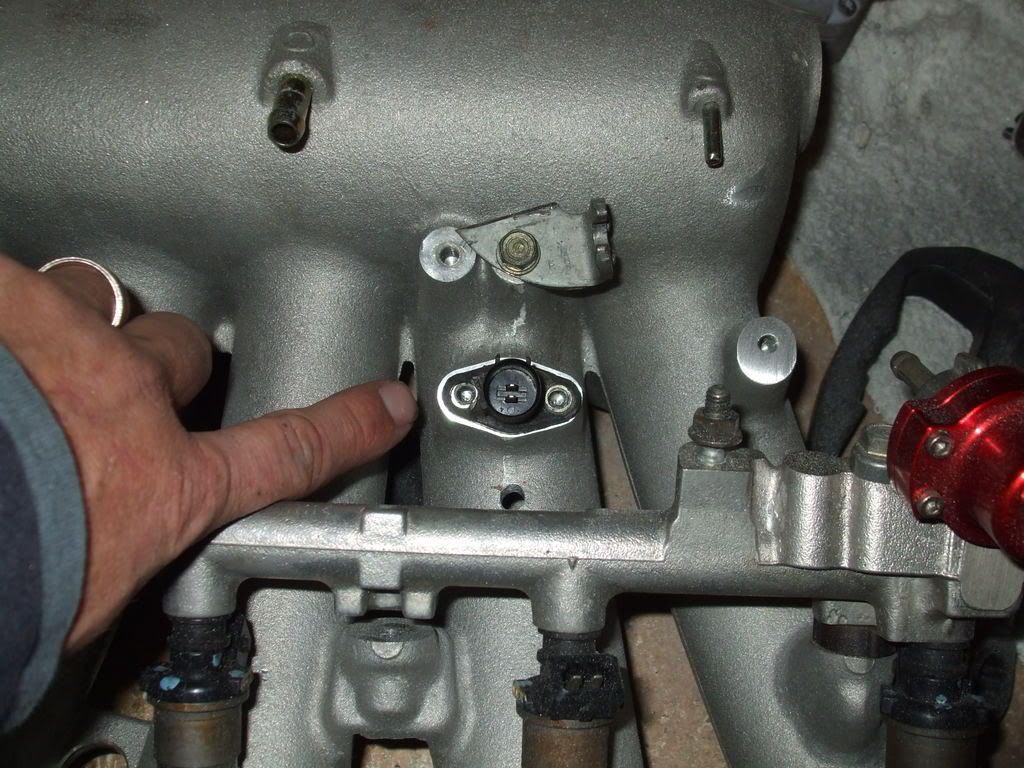
Here's the air intake temp sensor in it's normal postion. It needed to be moved so I could thread the fogger in place.

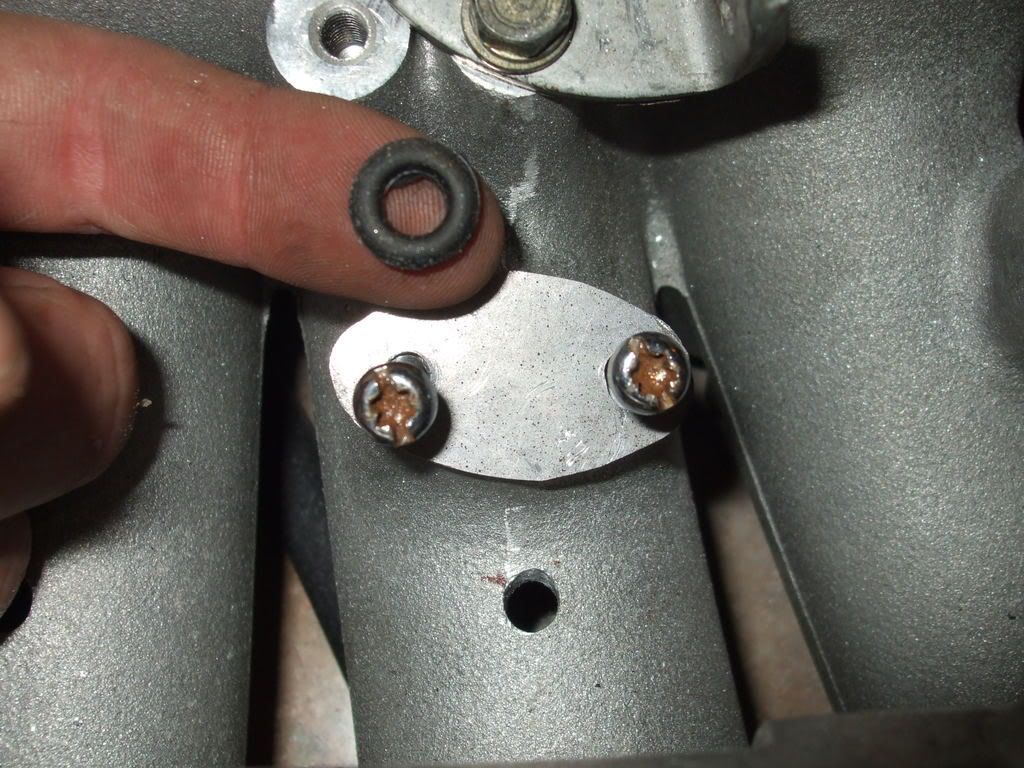
So I made a block off plate and set the little o ring under it.

and here it is relocated to the back

Ok and the fast Idle thermo hasnt been in use for a long time but all I did was block it off with a soda can and bolt the FIT back on. It allways bothered me due to the fact that it doesnt do anything and just hangs there.

So heres the block off plate

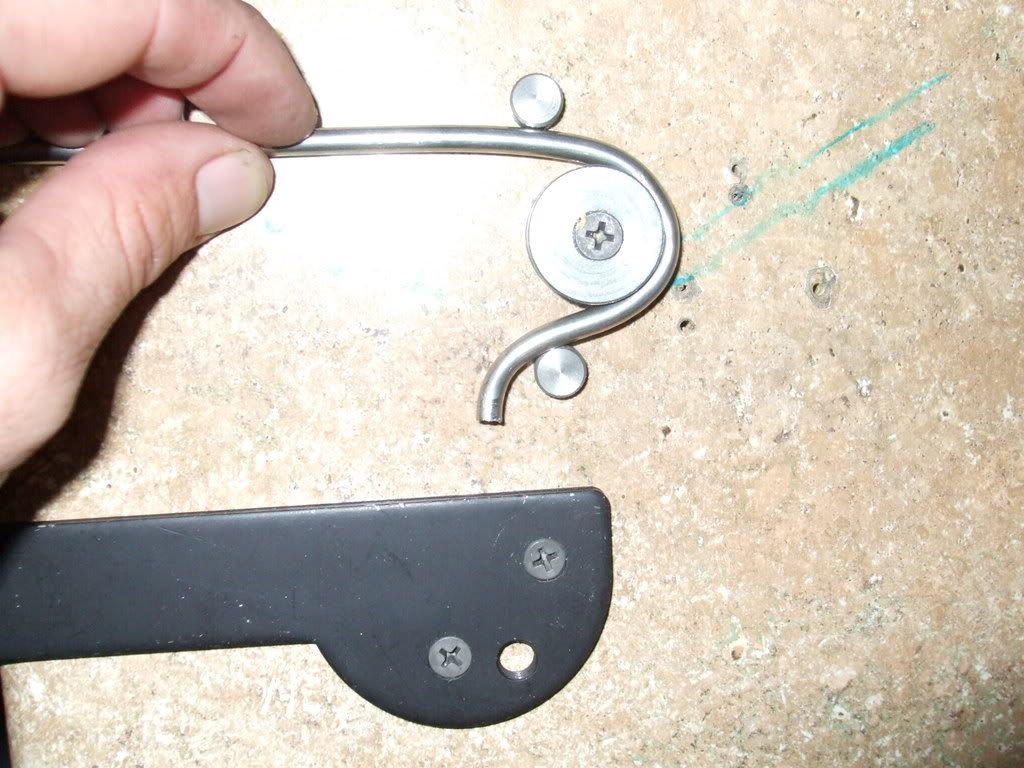
I went ahead and bent all the lines for the kit today. It was a bit scary trying to get them all to go where they need to go and make them all look the same and look good. So I started by making a jig instead of doing it by hand like I did the hangars for my mock up. The stainless tubes would have been really tough to bend without the use of a jig. So heres my jig using the parts from the bender and my trusty workbench.

heres a couple shots of it in the car. almost done with the bending

I went home yesterday after visiting Robbie and Chris at Restylers yesterday and got straight to work on the Direct port kit. I got the last two lines bent and set in place, to ensure everything would bolt up i tightened everything down just a little. Then I proceded to take it all back apart and clean clean clean. I cleaned every little piece very carefully to ensure that I got all the tiny little fragments of metal off of all the pieces. Once everything was super clean I sealed all the intake holes in the mani with blue painters tape and sealed the throttle body area. Once that was all done I reinstalled the foggers with teflon tape angeling them so that they would all spray directly towards the ports on the head reducing any chances of puddeling. All this took a solid two to three hours since I am insanely meticulious and a little OCD about my car. Once the mani was finished I moved on to mocking up my new fuel distribution system. I think I have come up with a nice mounting location that will serve its purpose well. Heres a quick pic I took to give an idea. The distribution block is the red thing that the FPG is mounted to. The tee comming off the D block is where my solonoids will mount. There is another hole on the other side next to the tee for my fuel rail feed line and one more hole on the bottom so I can mount my fuel filter. I cant wait to see what my fuel pressure is after this change it should increase.

Ok another quick update. I got some more parts in today to modify the nitrous side of the system to facilitate the extra solonoid. here ya go.

And the finished product

I did have to install a couple switches for arming and then Hondata s300 controlls the rest

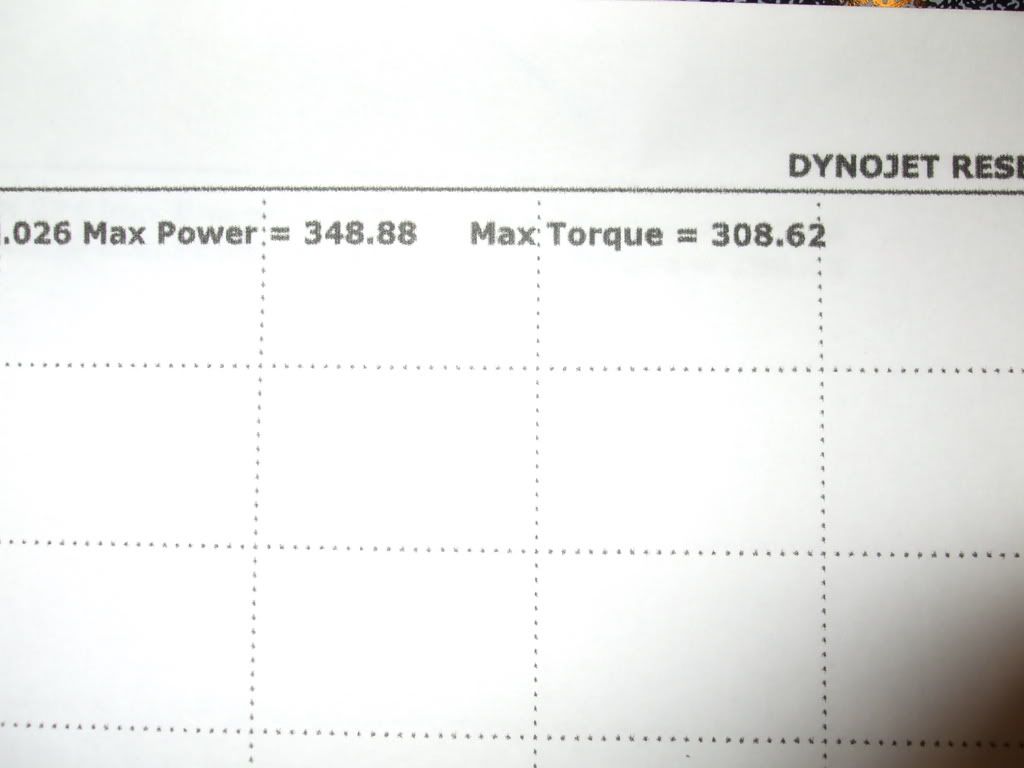
Heres the numbers it made with a 100 shot on the direct port kit and a 65 shot through the second stage wet kit


I've been running my current NOS wet kit for about a year now and have reached it's max abilities at a 100 shot. We've dynoed and tuned everything we could get outta the wet kit and now it's time for more spray. The most effective way to increase the ammount of nitrous one can spray into their motor is through a direct port kit. The direct port kit sprays both fuel and nitrous directly into each intake manifold runner providing maximim HP and effectiveness. Since I already have my current wet kit there's no need to buy another bottle which can be quite costly. The main feed line from the bottle to the solonoids is also something else that can be reused. A tee fitting will be needed at both the current fuel slpitter and the nitrous feed line before the solonoids. Of course a preassembled direct port kit is the way to go, with all the nessesarry fittings and lines included. I personally would prefer to use stainless braided lines from the foggers to the distribution blocks but the cost goes through the roof. Just to buy the 8 braided lines needed to plumb the kit its an extra $240. So im going to try my hand at bending the hard lines that come with the kit. I have a tubing bender that NOS sells just for this purpose, I'm sure patience will be the key to getting it right and asthetically pleasing.
I started by removing my aftermarket Blox (skunk knockoff) intake manifold. If you can't do this step without a how to tutorial you probably have no business installing a direct port kit. Once the intake manifold is off the car, it's a good idea to tape over the runners in the head to keep any debris or small critters out of your engine.
Once the intake mani is off the engine, it's time to start mocking up where you want everything to go. Like where the foggers will sit with no clearance issues from the fuel rail or misc sensors. In my case I had to relocate the intake air temp sensor to the back of the manifold by drilling three holes and remounting it. Then since I wanted all the lines on top of the mani instead of under it, I also had to ensure that the fuel rail would come off and on without contacting the foggers or lines. Once I determined where I wanted the foggers to sit I discovered a few slight clearance issues. After a few slight modifications to the manifold I was back in business.
Some people opt to put all the foggers and lines under the manifold to keep the engine bay cleaner looking but it makes servicing the system a major pain. Also the jets would be under the mani making them very hard to change on the fly. With all the plumbing on top of the mani I make all the changes I want quickly and easily.
Next I measured the postions for the foggers and marked them with a sharpie. I predrilled a divit into the marked spot with a small bit and then proceded to drill the hole just a slight bit smaller than the foggers threads so tomorrow I can tap the soft aluminum to match the foggers threads. (I gotta go buy a tap tomorrow) With the foggers sitting at just the right angle it was time to figure out where I want the distribution blocks. For my needs im going to have them hover right over the top of the intake manifold. This will get the hard lines as short as possible and ill have to make the least amount of bends.
Here's a shot of the foggers in place and the distribution blocks in their general area.
In typical "Disco" fasion this small job just turned large. With all the projects I undertake with my Integra there are always a couple little thing that need to be adressed either for function or form. While setting up my direct port kit to go in I have seen a few little thing that need to be changed out to make the engine bay both less cluttered and more convient.
Example. The huge bulky fuel filter is in the perfect place for me to mount my fuel solonoids to get them out from behind the intake mani where alot of heat builds up. Heat near fuel solonoids = bad day. So what's the solution? Buy an inline fuel filter just like the kind that you can buy for your nitrous kit right? Yes. But if I'm going to do that then I may as well change all the lines out to braided stainless and put the nessesary fittings in place to accept my fuel pressure gauge and three more outputs. One for the fuel rail and two more for fuel solonoids.
So now I've got to make a new bracket to mount the solonoids and the new fuel filter to in the place of the current fuel filter position and buy a whole crap load of expensive braided lines and fittings. At least I'll know I did it a right as I could when it's done.
I mocked up the bends tonight with some rubber coated white hangers so I could make all the bends without ruining the tubing the kit came with. Now that the bends are made with hangars I can copy them with the tubing. Here's the best set up I could create and keep all the bends mellow. The lines aren't exactly like they will be when it's done. There are a couple bends that need minor adjustments.
Here's the air intake temp sensor in it's normal postion. It needed to be moved so I could thread the fogger in place.
So I made a block off plate and set the little o ring under it.
and here it is relocated to the back
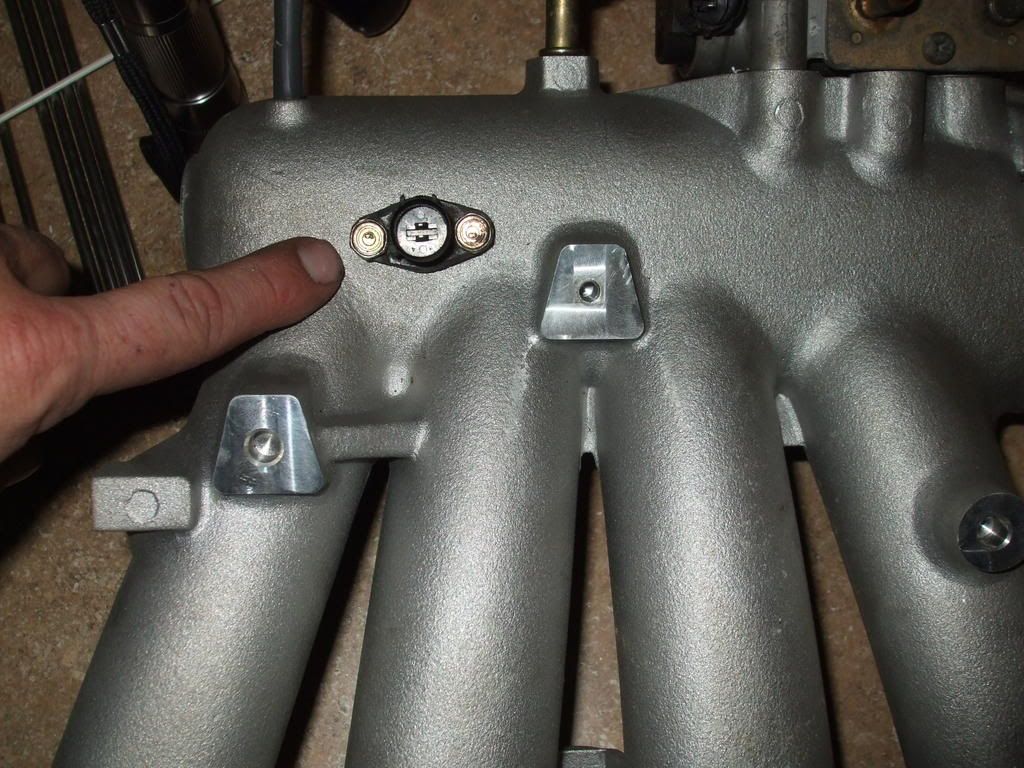
Ok and the fast Idle thermo hasnt been in use for a long time but all I did was block it off with a soda can and bolt the FIT back on. It allways bothered me due to the fact that it doesnt do anything and just hangs there.
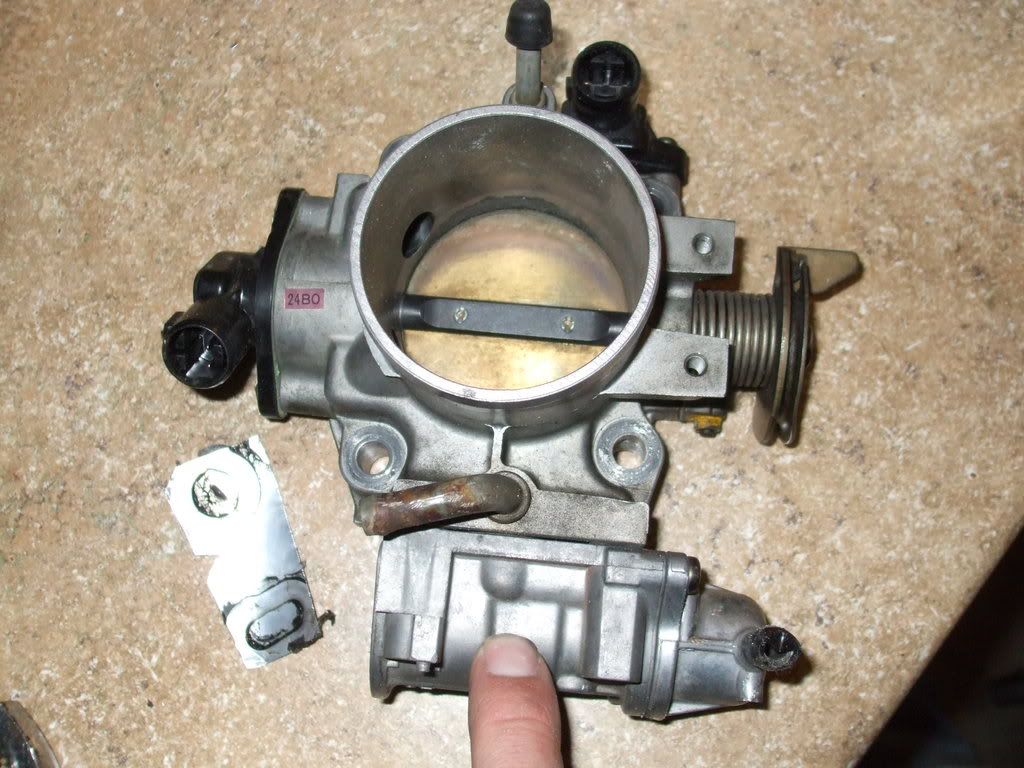
So heres the block off plate

I went ahead and bent all the lines for the kit today. It was a bit scary trying to get them all to go where they need to go and make them all look the same and look good. So I started by making a jig instead of doing it by hand like I did the hangars for my mock up. The stainless tubes would have been really tough to bend without the use of a jig. So heres my jig using the parts from the bender and my trusty workbench.
heres a couple shots of it in the car. almost done with the bending
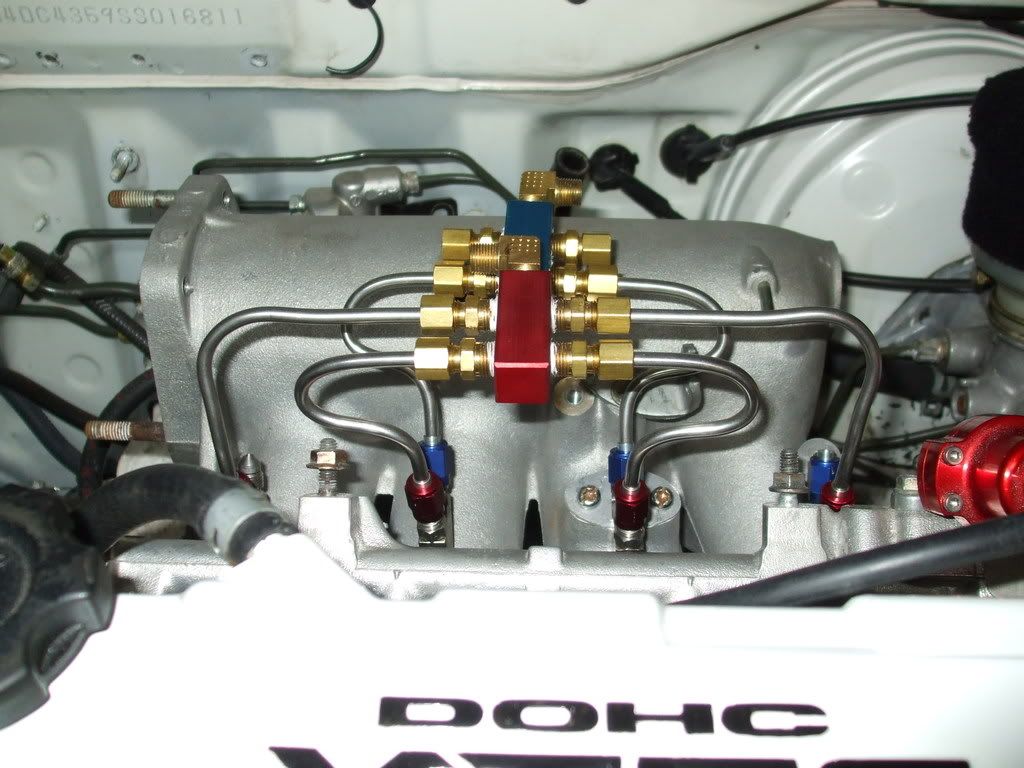
I went home yesterday after visiting Robbie and Chris at Restylers yesterday and got straight to work on the Direct port kit. I got the last two lines bent and set in place, to ensure everything would bolt up i tightened everything down just a little. Then I proceded to take it all back apart and clean clean clean. I cleaned every little piece very carefully to ensure that I got all the tiny little fragments of metal off of all the pieces. Once everything was super clean I sealed all the intake holes in the mani with blue painters tape and sealed the throttle body area. Once that was all done I reinstalled the foggers with teflon tape angeling them so that they would all spray directly towards the ports on the head reducing any chances of puddeling. All this took a solid two to three hours since I am insanely meticulious and a little OCD about my car. Once the mani was finished I moved on to mocking up my new fuel distribution system. I think I have come up with a nice mounting location that will serve its purpose well. Heres a quick pic I took to give an idea. The distribution block is the red thing that the FPG is mounted to. The tee comming off the D block is where my solonoids will mount. There is another hole on the other side next to the tee for my fuel rail feed line and one more hole on the bottom so I can mount my fuel filter. I cant wait to see what my fuel pressure is after this change it should increase.
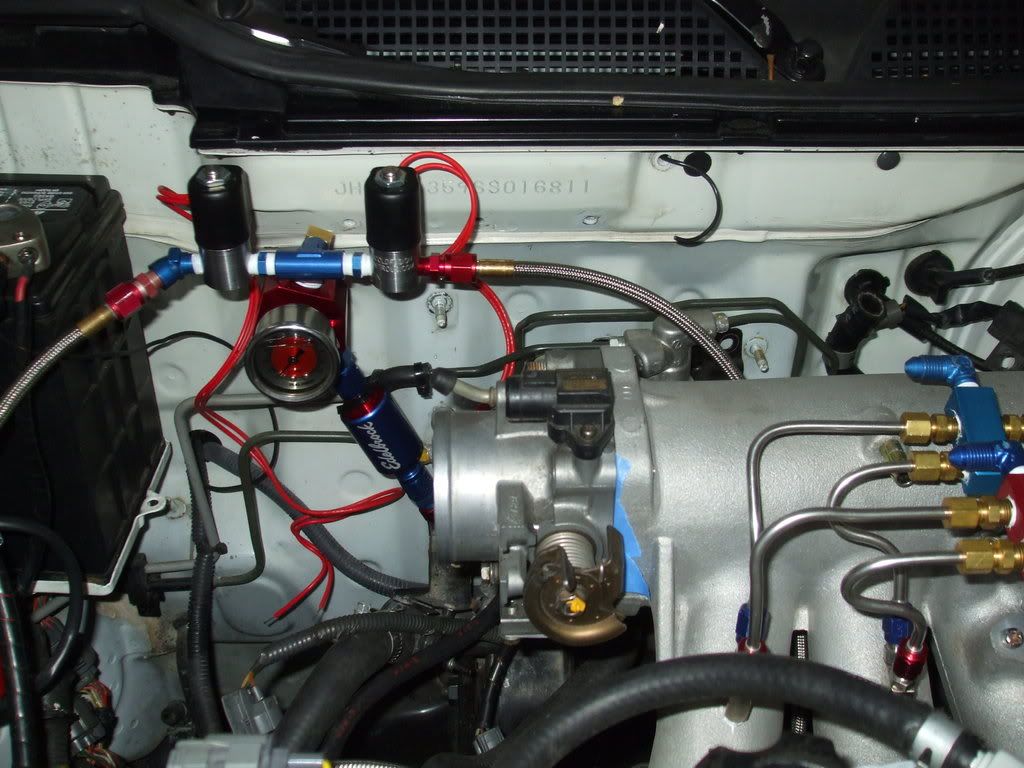
Ok another quick update. I got some more parts in today to modify the nitrous side of the system to facilitate the extra solonoid. here ya go.

And the finished product
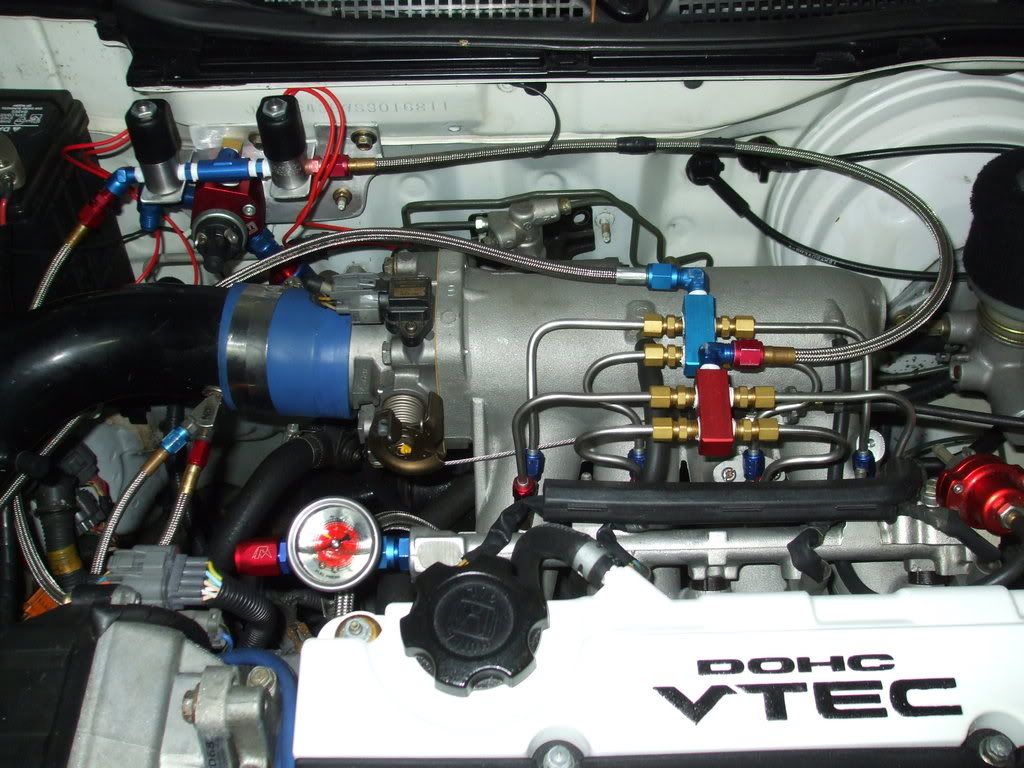
I did have to install a couple switches for arming and then Hondata s300 controlls the rest

Heres the numbers it made with a 100 shot on the direct port kit and a 65 shot through the second stage wet kit


Last edited:

