Tree's...Roadster?
- Thread starter treeafodo
- Start date
treeafodo
Austin
After seeing scradley's post in the craigslist/kijiji finds thread about a hardtop for $650 canadian I messaged the seller and set up a time on Sunday (yesterday) to come pick it up. I tried really hard to fit the soft top frame in the Integra, but it wasn't possible. If the soft top didn't fit in the car a hardtop wouldn't. After messaging everyone I knew who had a larger vehicle, I was able to borrow my friend's GMC Jimmy. I finished work at 5 and made the trip up. After the 3 hour drive there I pulled up to a house that looked sort of familiar and I didn't know why it was familiar. After entering the garage to see the hardtop I knew why it looked familiar. I've seen pictures of it from following my all time favourite miata build.
 by Austin Rajki, on Flickr
Seeing this car in person was actually amazing. This is the car that I am taking a lot of my inspiration and ideas from.
We loaded the hardtop in my friend's Jimmy. If the truck was any smaller it wouldn't have fit. It fit like a glove.
 Untitled by Austin Rajki, on Flickr
We spent an hour talking about things and I got a lot of ideas and advice about things that I wasn't sure about for my build. I'm more excited about meeting him and seeing his car than I am about buying the hardtop. :lol:
After a while of talking I started the trip home.
By the time I got home, installed the top on the car and returned the truck to my friend it was 2am. Here is a quick shot of the top on my car.
 by Austin Rajki, on Flickr
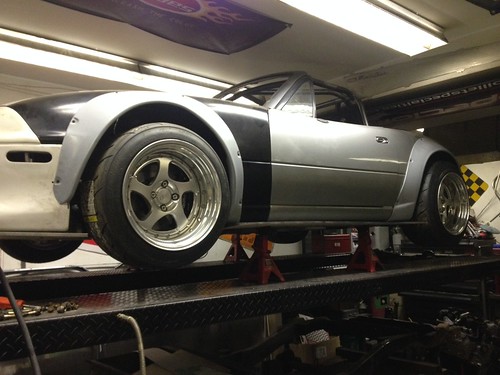 by Austin Rajki, on Flickr
Seeing this car in person was actually amazing. This is the car that I am taking a lot of my inspiration and ideas from.
We loaded the hardtop in my friend's Jimmy. If the truck was any smaller it wouldn't have fit. It fit like a glove.
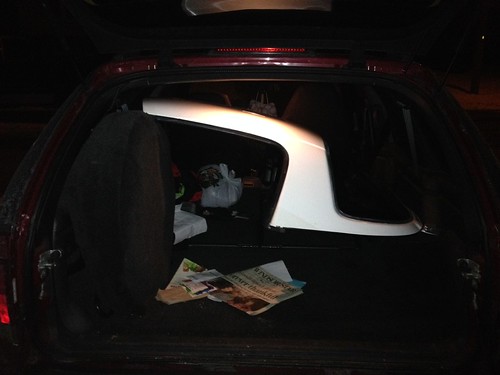 Untitled by Austin Rajki, on Flickr
We spent an hour talking about things and I got a lot of ideas and advice about things that I wasn't sure about for my build. I'm more excited about meeting him and seeing his car than I am about buying the hardtop. :lol:
After a while of talking I started the trip home.
By the time I got home, installed the top on the car and returned the truck to my friend it was 2am. Here is a quick shot of the top on my car.
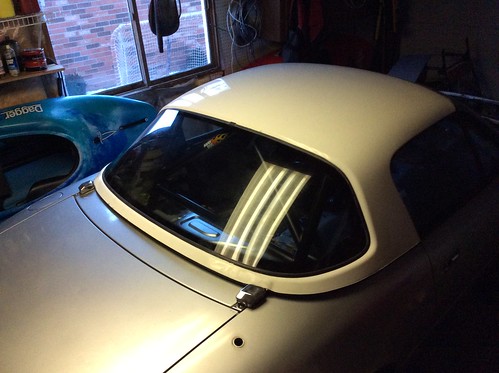 by Austin Rajki, on Flickr
treeafodo
Austin
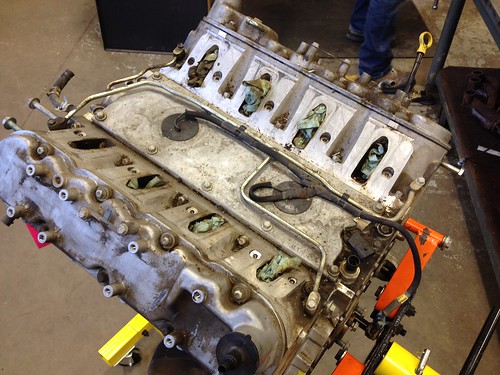
I got the engine mounted on the stand last Friday. The arms that were included with the stand I bought were too short to reach where they needed to go on this block. With the teacher's permission, I rummaged around in the school's storage room I found and traded my arms for the longer arms that I needed.
 Ls1 Mounted on Stand by Austin Rajki, on Flickr
Couple random reference shots.
 Mounted by Austin Rajki, on Flickr
 OEM Starter by Austin Rajki, on Flickr
In today's lab I stripped the engine of the exhaust manifolds, engine mounts and all the sensors in preparation to tear it down and rebuild it. This tag was on the engine saying that all the oil has been drained prior to my purchase.
 Tag by Austin Rajki, on Flickr
Although they claimed to have drained all the oil, I decided to double check the dipstick before removing the oil temperature and oil level sensors. I'm glad I checked. The sump was full and the oil was pretty clean.
 Oil by Austin Rajki, on Flickr
This is how the engine sits now.
 Stripped of the Sensors by Austin Rajki, on Flickr
And all the parts are labelled, in bags and are placed on a cart that is designated for only my parts.
 Parts Removed by Austin Rajki, on Flickr
I was planning on doing a leakdown test, but because of the in class demos I was running short on time. I did attempt to do the first cylinder and got a reading of 10% leakage. For those of you who don't know 20% leakage is considered normal in an engine so I am very happy with the 10%. BUT I'm not 100% certain that the inlet pressure was correct for the tester I was using. We will see if the inlet pressure was correct or not next week.
I ordered a camshaft and have word that it has arrived in Detroit. I will try picking it up sometime this week.
As I was typing out this post an older gentleman stopped by regarding some of the parts I was selling. He ended up purchasing my soft top, OEM rad, OEM strut brace and OEM mirrors. I will be using that money this weekend to purchase a set of fenders, finish panel and possibly bumpers.
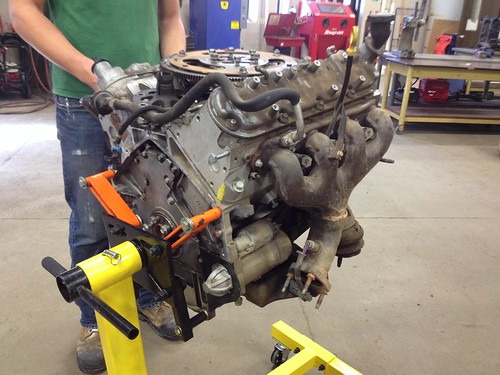 Ls1 Mounted on Stand by Austin Rajki, on Flickr
Couple random reference shots.
 Mounted by Austin Rajki, on Flickr
 OEM Starter by Austin Rajki, on Flickr
In today's lab I stripped the engine of the exhaust manifolds, engine mounts and all the sensors in preparation to tear it down and rebuild it. This tag was on the engine saying that all the oil has been drained prior to my purchase.
 Tag by Austin Rajki, on Flickr
Although they claimed to have drained all the oil, I decided to double check the dipstick before removing the oil temperature and oil level sensors. I'm glad I checked. The sump was full and the oil was pretty clean.
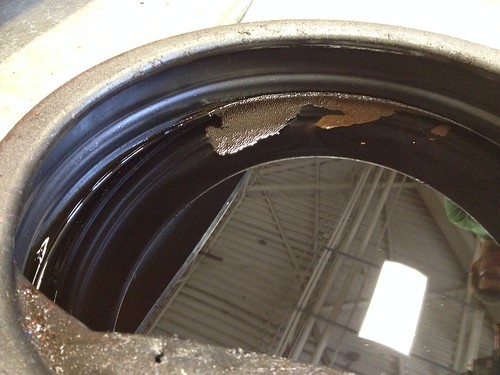 Oil by Austin Rajki, on Flickr
This is how the engine sits now.
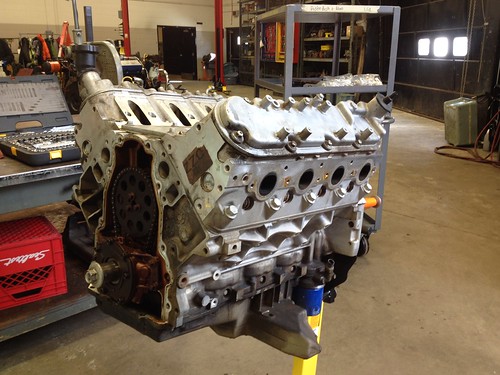 Stripped of the Sensors by Austin Rajki, on Flickr
And all the parts are labelled, in bags and are placed on a cart that is designated for only my parts.
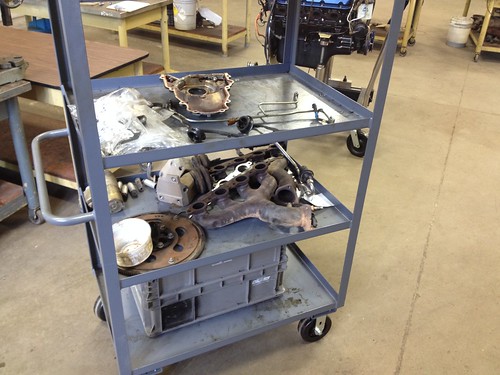 Parts Removed by Austin Rajki, on Flickr
I was planning on doing a leakdown test, but because of the in class demos I was running short on time. I did attempt to do the first cylinder and got a reading of 10% leakage. For those of you who don't know 20% leakage is considered normal in an engine so I am very happy with the 10%. BUT I'm not 100% certain that the inlet pressure was correct for the tester I was using. We will see if the inlet pressure was correct or not next week.
I ordered a camshaft and have word that it has arrived in Detroit. I will try picking it up sometime this week.
As I was typing out this post an older gentleman stopped by regarding some of the parts I was selling. He ended up purchasing my soft top, OEM rad, OEM strut brace and OEM mirrors. I will be using that money this weekend to purchase a set of fenders, finish panel and possibly bumpers.
Samurai_Blue
Yolo Whippin'
nice progress!
I think im going to be wrenching on a few miatas in due time. Building a motor with HKS or mahura cams projected to be like 180-190whp 1.8L. And getting another one ready for HPDE duties.
I think im going to be wrenching on a few miatas in due time. Building a motor with HKS or mahura cams projected to be like 180-190whp 1.8L. And getting another one ready for HPDE duties.
treeafodo
Austin
Nice! I was originally planning on building a 1.8 with about that power level, but the friend I was planning on buying the block and head off got really busy and it got pushed under the carpet. Mahura makes some sweet, parts!nice progress!
I think im going to be wrenching on a few miatas in due time. Building a motor with HKS or mahura cams projected to be like 180-190whp 1.8L. And getting another one ready for HPDE duties.
OH! I meant to message you about purchasing some Garage Star parts. Message sent through Facebook
8)Gangster
treeafodo
Austin
Today I was able to calibrate the leakdown tester and perform the leakdown test.
Firing order on the LS is 1-8-7-2-6-5-4-3 so the results will follow that.
Cylinder 1: 8% leakage
Cylinder 8: 8%
Cylinder 7: 8%
Cylinder 2: 8%
Cylinder 6: 88%- No, that is not a typo.
Cylinder 5: 7%
Cylinder 4: 72%
Cylinder 3: 8%
Both of the high leakage cylinders were leaking from the valves- 1 on intake, the other on exhaust. I was really worried that a valve might have been bent, or even the seats were bad. I removed the valve covers to double check that the valves were set correctly and did it again. Still leaking from the valves... The first thing that I did was took a mallet to the valve and valves spring and gave it a few whacks to free up any carbon that would prevent the valves from closing all the way. When I did the leakdown on those 2 cylinders again it went from 88% to 16% and the other went from 72% to 22%.
That was a huge relief. The leakdown test gave me a general idea of what condition the engine was in. I'm pretty happy with the results. 20% is considered normal.
After the leakdown was done I removed the heads. As you can see there is a decent amount of carbon on the pistons, but everything is pretty clean for 128k miles. I'm fairly confident that if I were to clean all the carbon out, I would have 8% on all cylinders.
 Short Block by Austin Rajki, on Flickr
 Heads Removed by Austin Rajki, on Flickr
Firing order on the LS is 1-8-7-2-6-5-4-3 so the results will follow that.
Cylinder 1: 8% leakage
Cylinder 8: 8%
Cylinder 7: 8%
Cylinder 2: 8%
Cylinder 6: 88%- No, that is not a typo.
Cylinder 5: 7%
Cylinder 4: 72%
Cylinder 3: 8%
Both of the high leakage cylinders were leaking from the valves- 1 on intake, the other on exhaust. I was really worried that a valve might have been bent, or even the seats were bad. I removed the valve covers to double check that the valves were set correctly and did it again. Still leaking from the valves... The first thing that I did was took a mallet to the valve and valves spring and gave it a few whacks to free up any carbon that would prevent the valves from closing all the way. When I did the leakdown on those 2 cylinders again it went from 88% to 16% and the other went from 72% to 22%.
That was a huge relief. The leakdown test gave me a general idea of what condition the engine was in. I'm pretty happy with the results. 20% is considered normal.
After the leakdown was done I removed the heads. As you can see there is a decent amount of carbon on the pistons, but everything is pretty clean for 128k miles. I'm fairly confident that if I were to clean all the carbon out, I would have 8% on all cylinders.
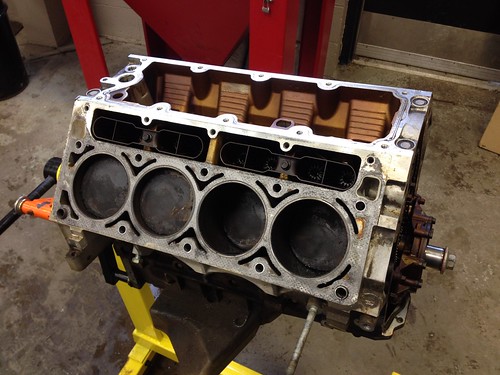 Short Block by Austin Rajki, on Flickr
 Heads Removed by Austin Rajki, on Flickr
treeafodo
Austin
You don't own a Miata, do you Gbaby?
 haha
haha
Sent from my iPhone using Tapatalk
They're still kicking around for a reasonLook at those antique push rods :lol:
Sent from my iPhone using Tapatalk
Gbaby2089
Negative Ned
Nope, nearly bought one quite a few times though hahaYou don't own a Miata, do you Gbaby?
treeafodo
Austin
After work on Tuesday I drove up to Hamilton to pick up some parts. The way up was perfect, the way back was 3 hours in a complete white out. Could not see a thing due to the snow.
I ended up getting 2 fenders, rear bumper and a finish panel for a good price. The fenders are both rust free and will replace mine which are dented and have rust on the bottom.
 Parts by Austin Rajki, on Flickr
The finish panel is mint!
 Finish Panel by Austin Rajki, on Flickr
The rear bumper was super cheap. The downside is it has some scratches. They shouldn't be a problem since I'm going to cut it any ways.
 Bumper by Austin Rajki, on Flickr
 Closeup Of Bumper by Austin Rajki, on Flickr
I haven't touched the car in the last little bit, but I have done a lot of work in the garage. I've spent a lot of time cleaning and organizing things. I still have work to do, mostly against the back wall, but it's much better. More lights have been added as well as blinds on the window.
Before:
[url=https://flic.kr/p/pQG3Dm] New Home! by Austin Rajki, on Flickr
Now:
 Garage by
I'm parting out my 1.6 to get that out of there as well.Austin Rajki, on Flickr
I ended up getting 2 fenders, rear bumper and a finish panel for a good price. The fenders are both rust free and will replace mine which are dented and have rust on the bottom.
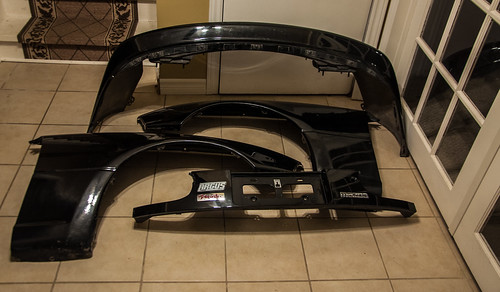 Parts by Austin Rajki, on Flickr
The finish panel is mint!
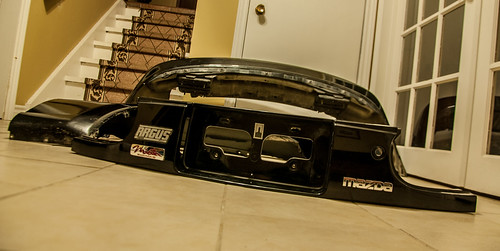 Finish Panel by Austin Rajki, on Flickr
The rear bumper was super cheap. The downside is it has some scratches. They shouldn't be a problem since I'm going to cut it any ways.
 Bumper by Austin Rajki, on Flickr
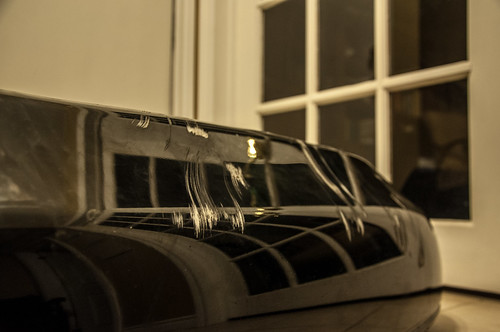 Closeup Of Bumper by Austin Rajki, on Flickr
I haven't touched the car in the last little bit, but I have done a lot of work in the garage. I've spent a lot of time cleaning and organizing things. I still have work to do, mostly against the back wall, but it's much better. More lights have been added as well as blinds on the window.
Before:
[url=https://flic.kr/p/pQG3Dm]
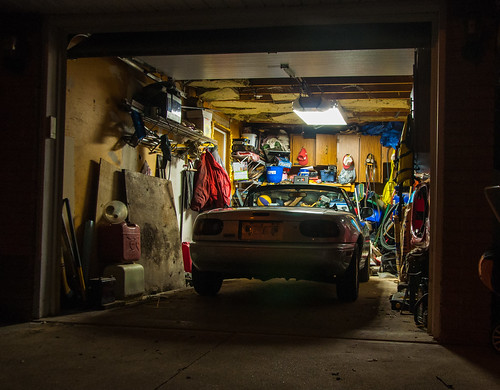 New Home! by Austin Rajki, on Flickr
Now:
 Garage by
 I'm parting out my 1.6 to get that out of there as well.Austin Rajki, on Flickr
treeafodo
Austin
It's been tight in there. Having it cleaner helps a lot. Even with the car on jack stands it's still shorter than my shoulders.You get props for doing all that work in that little garage. Good thing the Miata's tiny!
Sent from my iPad using Tapatalk

