Ted's Owner
On to Integra number two!
Hey y'all,
My doors looked terrible when I first got my car. The locks were messed up (fixed that before this thread), the sound deadener was missing, and the speakers were blown. Now, so far, I have only done the passenger's side front door. I will be rebuilding the left door probably Tuesday; if I don't finish it then, I'll finish it Thursday. The passenger's door took about 7 hours of time to build.
EDIT: I finished the driver's side door today. I didn't take any pictures, but there are a few things I had to do differently for this door; those will be written in blue.
Here's what tools you'll need:
- Flathead screwdriver
- Phillips screwdriver
- Corded drill
- Cordless drill
- Paint stripping disc
- Paint (if desired)
- #10-32 screws and hex nuts
- 3/8" washers
- Electrical tape
- Soldering iron and soldering wire
- Box cutter
- Scissors
- Cleaner/degreaser
- Goo Gone
- Wire strippers
I may be missing some things, but that's the jist of it. The speakers and sound deadener were left out of the list because that'll vary per build.
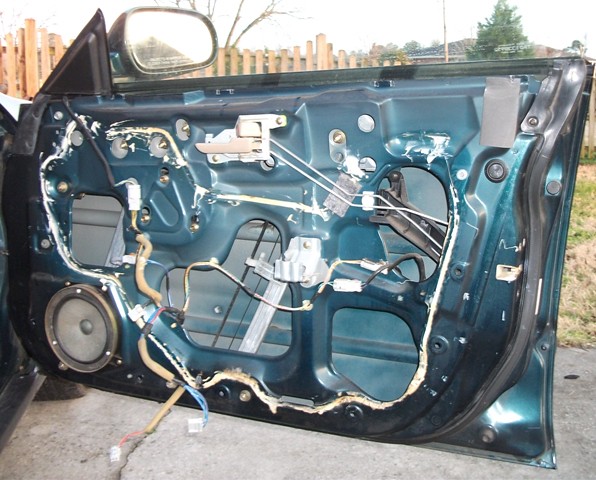
What the door looked like when I started.

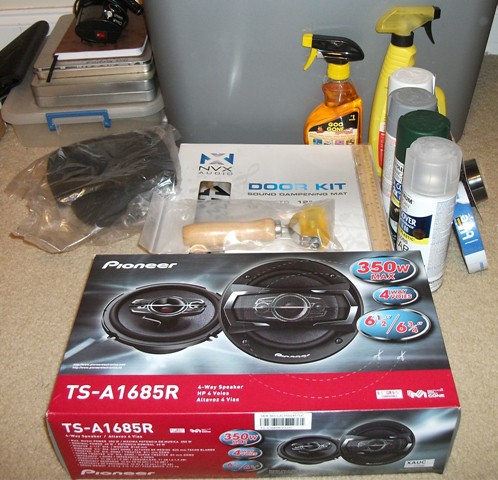
The parts.

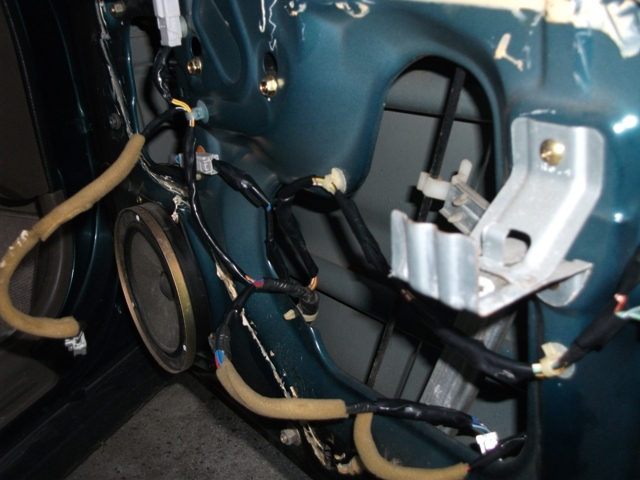
The wires wrapped in electrical tape.

Epoxy removed. Paint stripped to bare metal. This was the easiest way to get rid of the epoxy. You can use a putty knife to get the big chunks out, but for in the crevices, this is the way to go. When you finish grinding, spray Goo Gone on the remaining epoxy and wipe it off with a stiff rag. You may need to use some elbow grease, and you most likely won't get all of it removed, but you'll get 90% of it gone.

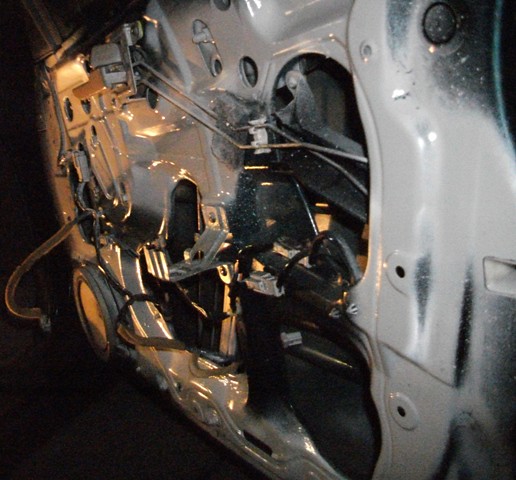
First coat of primer. It started getting dark, so the light you see is from a flashlight.

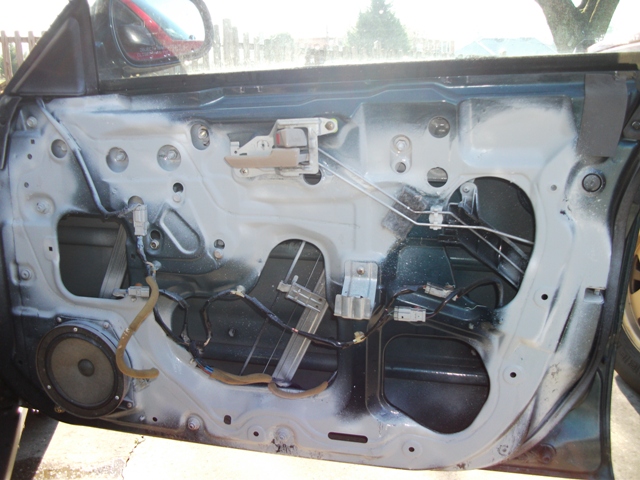
Second coat of primer and primer sealer.

Same as last picture next morning.

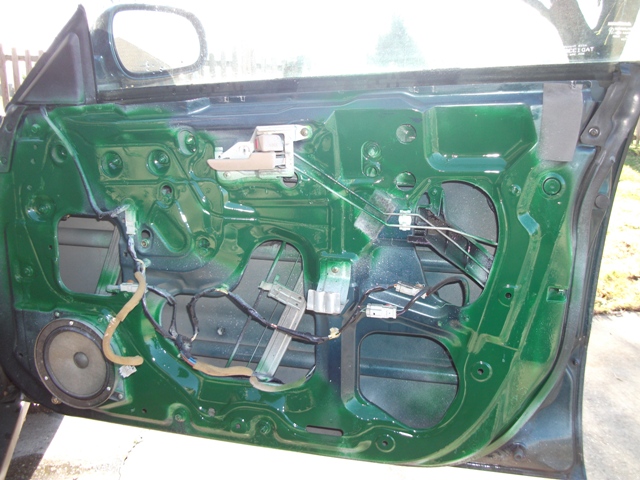
First coat of paint.

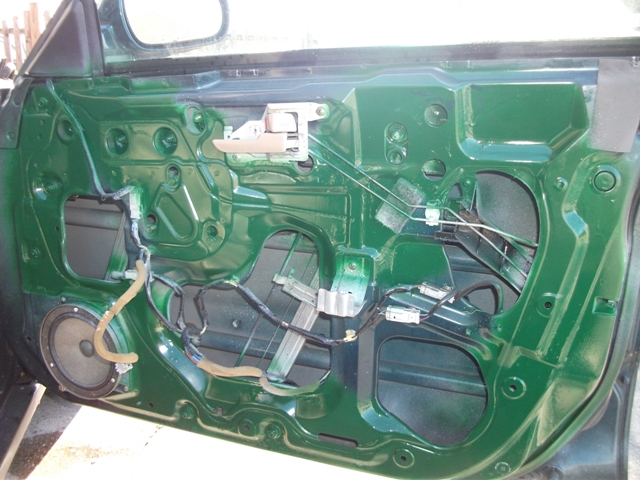
Second coat of paint and clear coat. I didn't wait long enough or stand back far enough to get a professional finish, but it doesn't really matter too much since it'll be covered anyways.

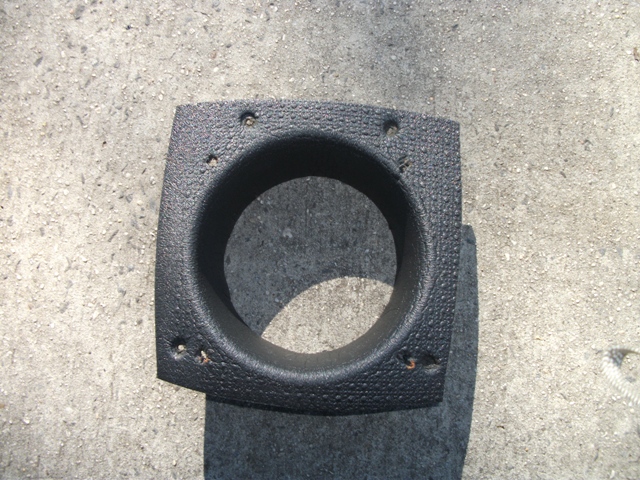
Modified speaker baffles. They were closed on the ends when I bought them, and they didn't have the holes in them. The factory speakers have baffles in them. Set the baffle on top of the new baffles and use a paint marker to mark the holes. Then, use the tip of the Phillips screwdriver to mark the holes. Four of them in the picture were the baffles, the other four were the speaker mounting holes. It'll be better to wait until the install of the speakers to drill the holes. I had issues with lining the holes up and had to re-drill two of them.
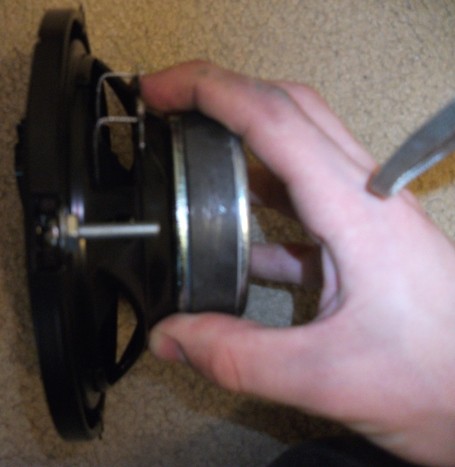
For the driver's door, I had to re-use and modify the factory speaker baffle, as well as the foam baffle because the magnet to the speaker was sticking to the rod that controls the windows. What I had to do was test-fit the new speaker in the factory baffle, use a paint marker on the back of the speaker baffle for how much material I would have to remove to get the magnet to fit, and then cut it.
This does push the speaker out kind of far, but it does give you enough clearance to install it. You'll also have to drill new holes into it to mount the speaker. Depending on the speaker, you may need to remove the speaker grilles out of the doors; I didn't yet, but I may. Clearance is close.

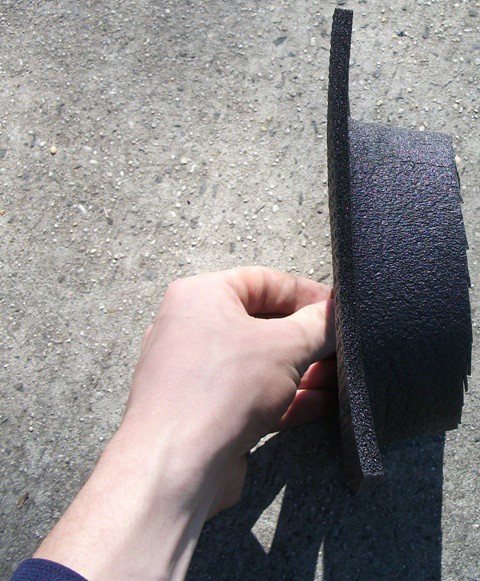
Side view of modified speaker baffles. I had to cut the backs off to get the clearance necessary to get everything to fit. To tell how much you need to cut off, plug the window switch back in and roll the window down. It'll go all the way down into the door, therefore giving you the necessary space. Mark it with a paint marker and cut the end off. Sorry for the crappy cut; I'm not the best with scissors.

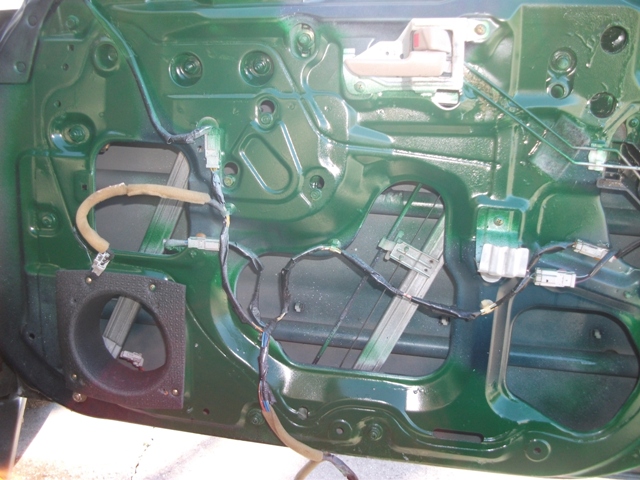
Test fit of speaker baffles.

The speaker wire adapters included with the speakers. The white wire is the positive and the white with black lined wire is negative.

My screw layout. #10-32 screws and hex nuts with 3/8" washers. The washers went behind the speakers, and the hex nuts went on the screw on the back of the door panel the speaker was mounted to.

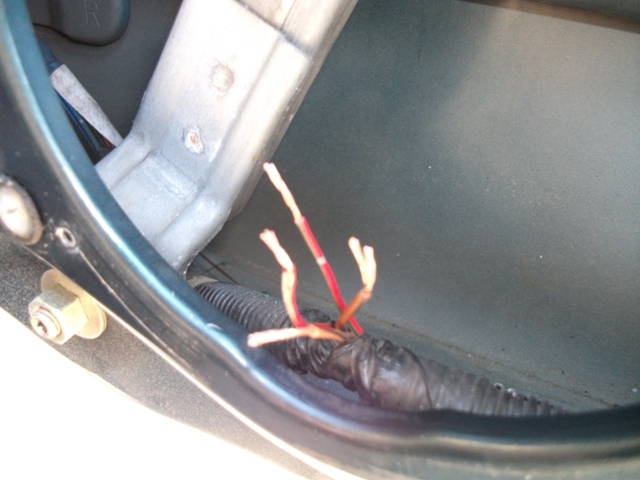
Stripped factory speaker wires. I had to cut the factory connector off.

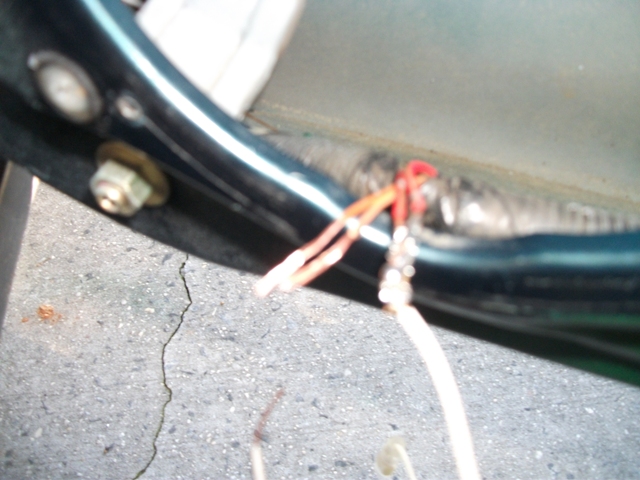
Soldered positive wire.

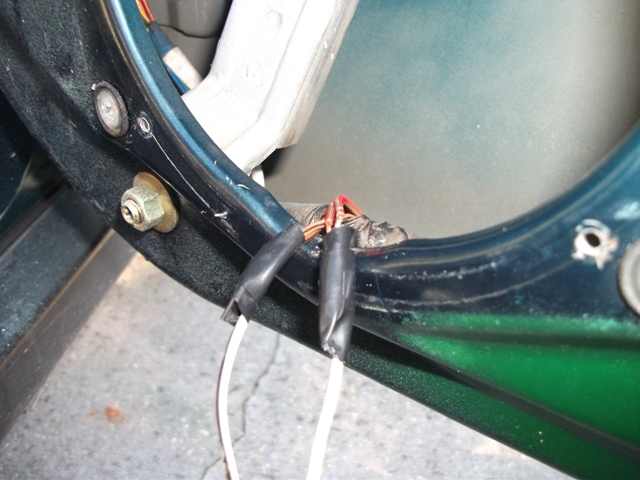
Finished wiring harness. The positive/white wire gets soldered to the red wires and the negative/white and black wire gets soldered to the orangish brown wires. On the driver's side, the positive/white wire gets soldered to the blue wires and the negative/white and black wire gets soldered to the white and black wires.

Speaker installed.

Sound deadener installed and finished product. When installing the sound deadener, I've found that it is easiest to put the sound deadener on the door in sheets and then cut it with the boxcutter. BE VERY CAREFUL! Th sound deadener I used was very hard to cut due to the adhesive, and you have to make sure not to cut any wires. It's a good idea to leave all of the wire connectors out of the sound deadener, as well as the lock mechanism rods. I used the NVX four door kit, which comes with four (4) 12"x36" sheets. I used two sheets on one door for full coverage and didn't have much leftovers.

But, yeah. That's the fairly quick version of how I did it. If you have any questions, feel free to ask!
My doors looked terrible when I first got my car. The locks were messed up (fixed that before this thread), the sound deadener was missing, and the speakers were blown. Now, so far, I have only done the passenger's side front door. I will be rebuilding the left door probably Tuesday; if I don't finish it then, I'll finish it Thursday. The passenger's door took about 7 hours of time to build.
EDIT: I finished the driver's side door today. I didn't take any pictures, but there are a few things I had to do differently for this door; those will be written in blue.
Here's what tools you'll need:
- Flathead screwdriver
- Phillips screwdriver
- Corded drill
- Cordless drill
- Paint stripping disc
- Paint (if desired)
- #10-32 screws and hex nuts
- 3/8" washers
- Electrical tape
- Soldering iron and soldering wire
- Box cutter
- Scissors
- Cleaner/degreaser
- Goo Gone
- Wire strippers
I may be missing some things, but that's the jist of it. The speakers and sound deadener were left out of the list because that'll vary per build.
What the door looked like when I started.
The parts.
The wires wrapped in electrical tape.
Epoxy removed. Paint stripped to bare metal. This was the easiest way to get rid of the epoxy. You can use a putty knife to get the big chunks out, but for in the crevices, this is the way to go. When you finish grinding, spray Goo Gone on the remaining epoxy and wipe it off with a stiff rag. You may need to use some elbow grease, and you most likely won't get all of it removed, but you'll get 90% of it gone.
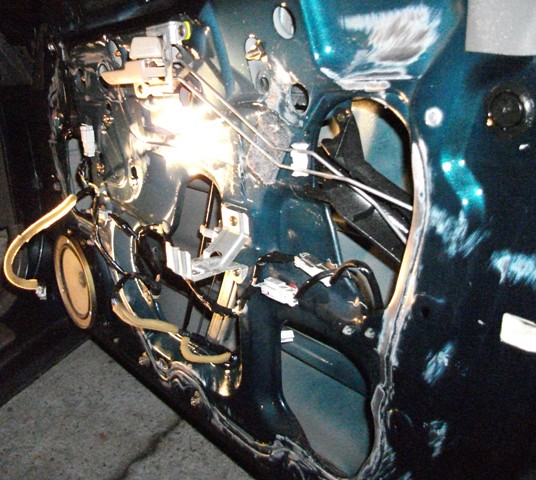
First coat of primer. It started getting dark, so the light you see is from a flashlight.

Second coat of primer and primer sealer.
Same as last picture next morning.
First coat of paint.
Second coat of paint and clear coat. I didn't wait long enough or stand back far enough to get a professional finish, but it doesn't really matter too much since it'll be covered anyways.
Modified speaker baffles. They were closed on the ends when I bought them, and they didn't have the holes in them. The factory speakers have baffles in them. Set the baffle on top of the new baffles and use a paint marker to mark the holes. Then, use the tip of the Phillips screwdriver to mark the holes. Four of them in the picture were the baffles, the other four were the speaker mounting holes. It'll be better to wait until the install of the speakers to drill the holes. I had issues with lining the holes up and had to re-drill two of them.
For the driver's door, I had to re-use and modify the factory speaker baffle, as well as the foam baffle because the magnet to the speaker was sticking to the rod that controls the windows. What I had to do was test-fit the new speaker in the factory baffle, use a paint marker on the back of the speaker baffle for how much material I would have to remove to get the magnet to fit, and then cut it.
This does push the speaker out kind of far, but it does give you enough clearance to install it. You'll also have to drill new holes into it to mount the speaker. Depending on the speaker, you may need to remove the speaker grilles out of the doors; I didn't yet, but I may. Clearance is close.
Side view of modified speaker baffles. I had to cut the backs off to get the clearance necessary to get everything to fit. To tell how much you need to cut off, plug the window switch back in and roll the window down. It'll go all the way down into the door, therefore giving you the necessary space. Mark it with a paint marker and cut the end off. Sorry for the crappy cut; I'm not the best with scissors.
Test fit of speaker baffles.
The speaker wire adapters included with the speakers. The white wire is the positive and the white with black lined wire is negative.

My screw layout. #10-32 screws and hex nuts with 3/8" washers. The washers went behind the speakers, and the hex nuts went on the screw on the back of the door panel the speaker was mounted to.
Stripped factory speaker wires. I had to cut the factory connector off.
Soldered positive wire.
Finished wiring harness. The positive/white wire gets soldered to the red wires and the negative/white and black wire gets soldered to the orangish brown wires. On the driver's side, the positive/white wire gets soldered to the blue wires and the negative/white and black wire gets soldered to the white and black wires.
Speaker installed.
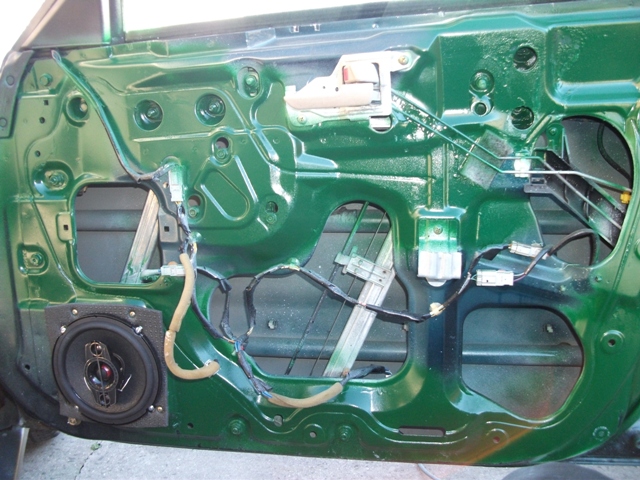
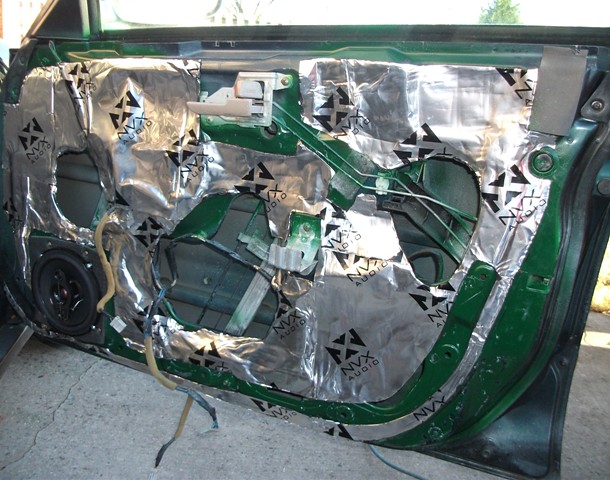
Sound deadener installed and finished product. When installing the sound deadener, I've found that it is easiest to put the sound deadener on the door in sheets and then cut it with the boxcutter. BE VERY CAREFUL! Th sound deadener I used was very hard to cut due to the adhesive, and you have to make sure not to cut any wires. It's a good idea to leave all of the wire connectors out of the sound deadener, as well as the lock mechanism rods. I used the NVX four door kit, which comes with four (4) 12"x36" sheets. I used two sheets on one door for full coverage and didn't have much leftovers.
But, yeah. That's the fairly quick version of how I did it. If you have any questions, feel free to ask!
Last edited:

